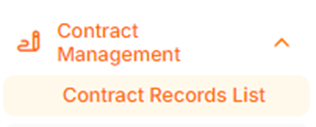
Contract Management
To create a new contract process, you should click on the Contract Record List menu under the Contract Management main heading.
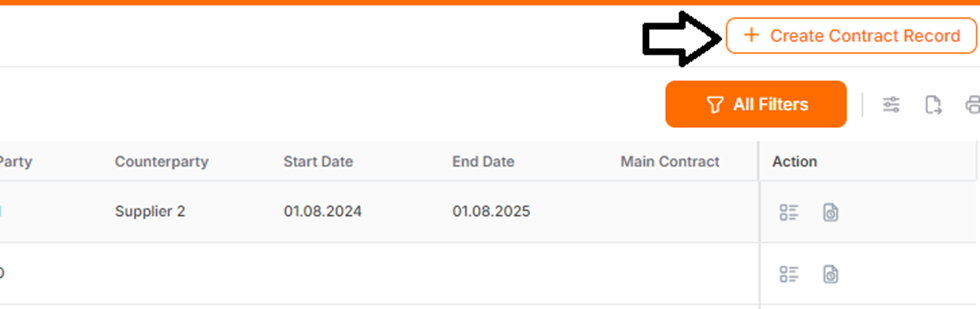
Click on the Create Contract Record button at the top right corner of the opened page.
Contract Information
This is the section where the basic information of the contract is entered. Mandatory fields in the Create Contract Record section are marked with an asterisk. If any of the specified fields are missing, you cannot proceed to the next step.
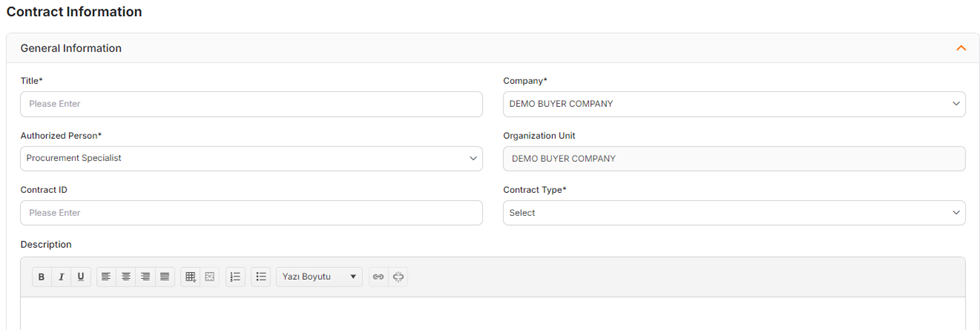
Title: This is the title of the contract. The title defined in this field is used in listing screens and email notifications.
Company: The companies associated with the user performing the transaction are listed in this field. If a user has authorization for only one company, the information for that single company will appear in the field, and that company will be selected by default.
Authorized Person: The information of the user performing the transaction is automatically assigned to this field. Users associated with the company are listed, and the authorized person can be changed.
Organizational Unit: The organizational unit of the company to which the user performing the transaction belongs is automatically assigned.
Contract Number: This represents the contract number assigned for the relevant contract. If an ERP system is used, the existing ID number can be entered in this field.
Contract Type: The type of contract to be processed is specified in this field. Contract types include Frame, Leasing, Confidentiality, Consultancy, Purchase and Protocol Addendum.
Description: This is the field where detailed explanatory information about the contract can be written.
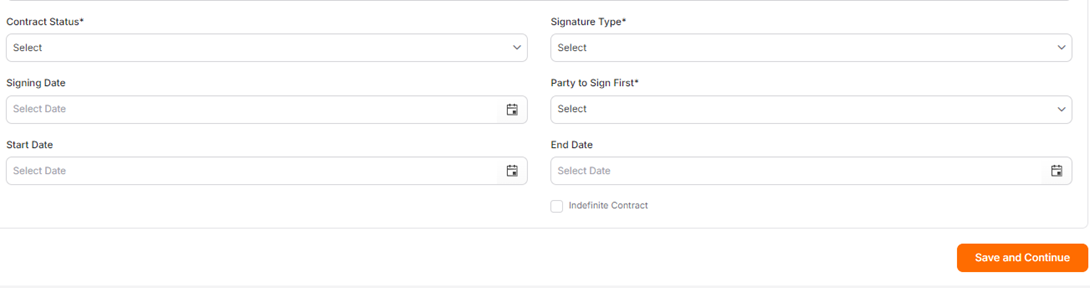
Contract Status: This field indicates the current status of the contract. Contract statuses that can be selected are Draft, Active, Under Approval, Expired, and Terminated.
Signing Date: This field is for entering the date when the contract was signed.
Party to Sign First: This field specifies which party will initiate the signing process of the contract.
Start Date: This field is for entering the date when the contract begins.
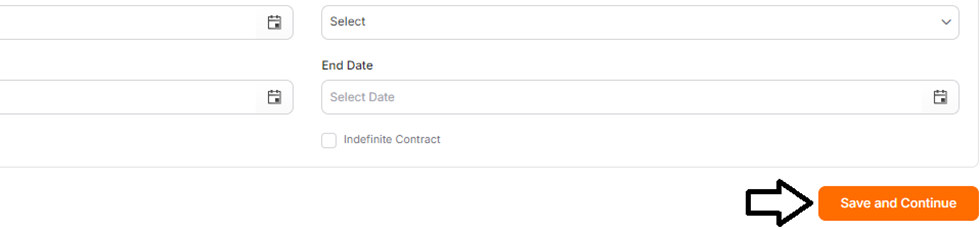
End Date: This field is for entering the date when the contract ends.
To create the contract, click the 'Save and Continue' button.
At this step, the contract is created in draft status. A unique ID number is assigned by the system for each created contract.
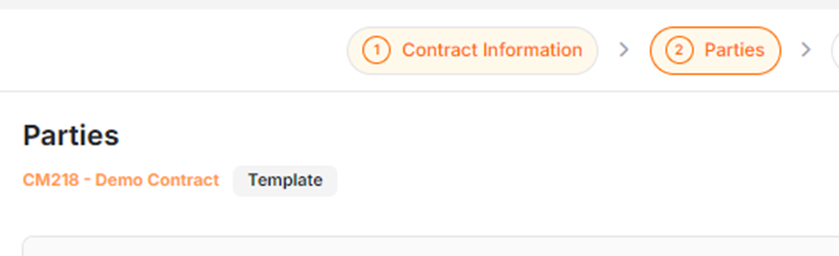
Parties
This is the section where the contract parties are determined.
Party: This is the field where a selection is made from the associated companies. The company is selected on the page that opens when you click the Add Party button

Counterparty: This is the field where information about the other company involved in the contract is selected. After clicking the Add Counterparty button and selecting the company on the opened page, the Save button should be clicked.

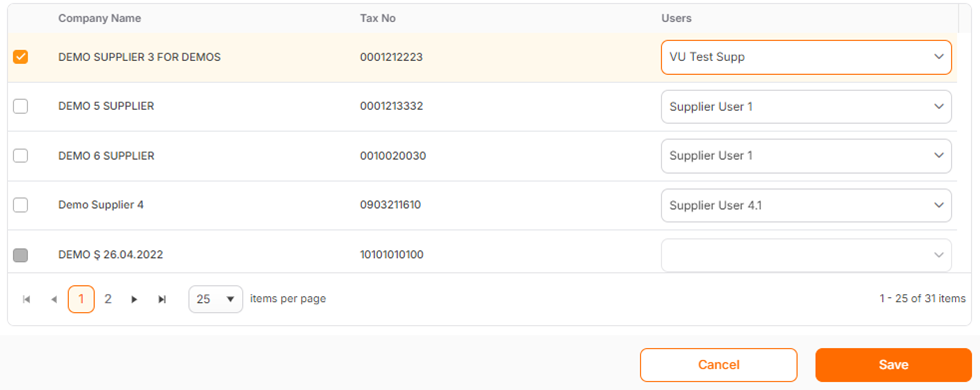
If there are multiple users associated with the counterparty in the Users column, select the relevant user.

Additional Fields
On this page, relevant fields can be activated and additional information for the contract can be filled in. Information entry is mandatory for the fields that are activated.
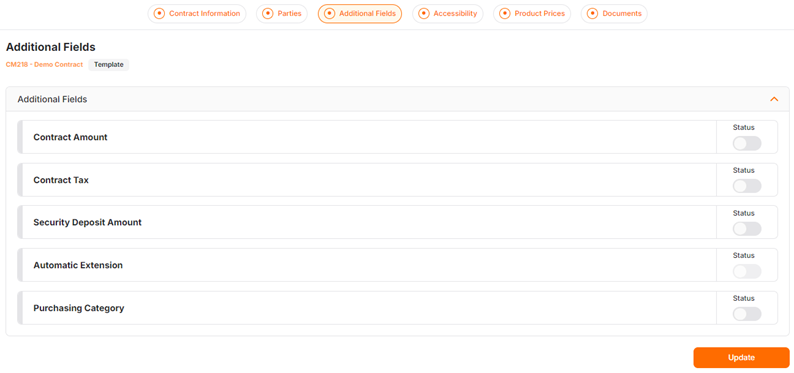
Contract Amount: The amount specified for the contract.

Contract Tax: The amount specified for the contract tax.
Tax Amount: The field where the specified tax amount and currency are entered.
If the “İs the Tax Amount Paid?” button is active, it means the tax amount has been paid.

Security Deposit Amount: The amount specified for the security deposit.
If the “Is the Security Deposit Amount User?” button is active, it means the security amount for the contract has been used.
Validity Period (Months): The field where the validity period for the security deposit is entered.

Automatic Extension: The field where the automatic extension period for the contract is entered.
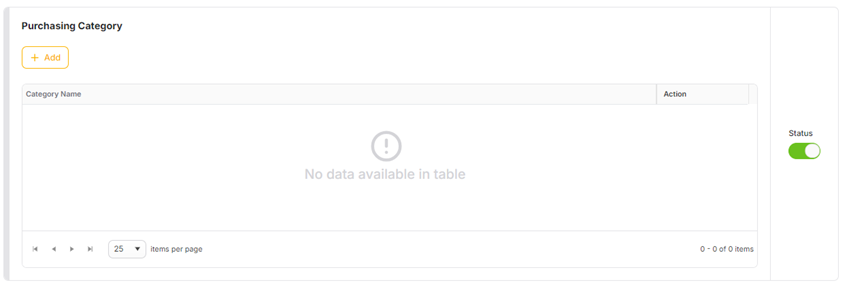
Purchase Category: The field where the category information specified for the contract is entered. Multiple categories can be selected in this field.
To save changes made in the Additional Fields section, the "Save and Continue" button should be clicked.
Accessbility
This is the section used to add users from the associated company to the contract in question.
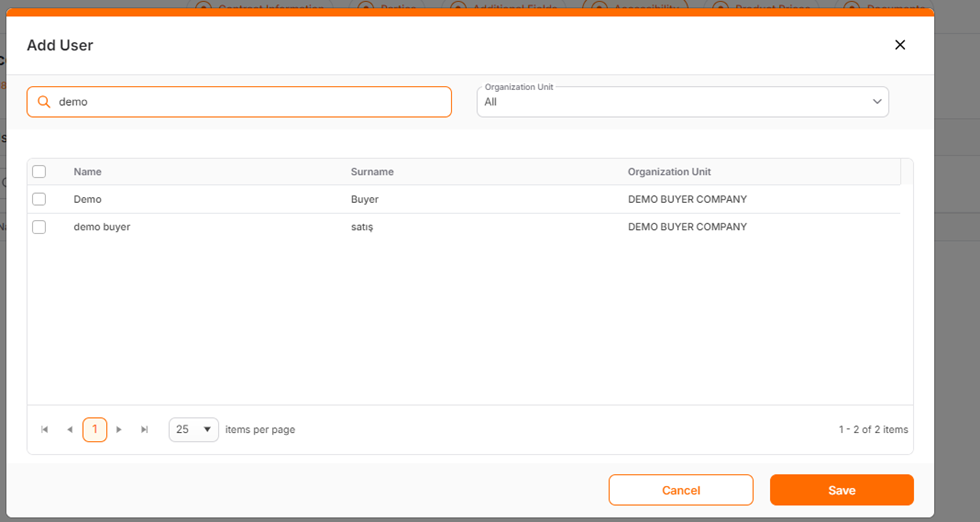
To add a user from the associated company, the "Add User" button should be clicked.
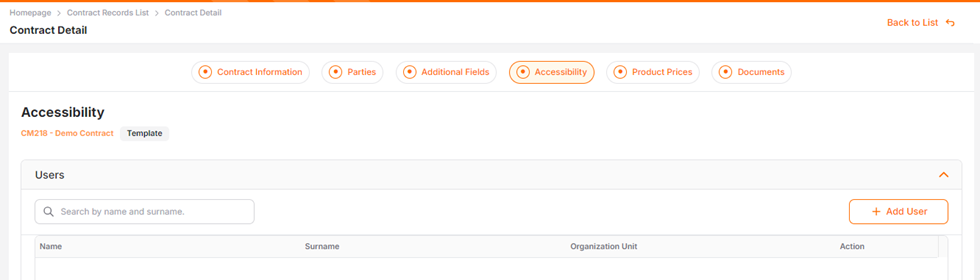
Users to be added to the contract group should be selected, and then the Save button should be clicked.
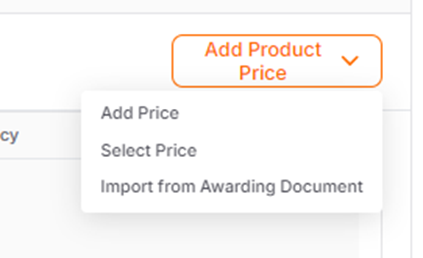
Product Prices
This is the section where product and price information related to the contract can be selected.
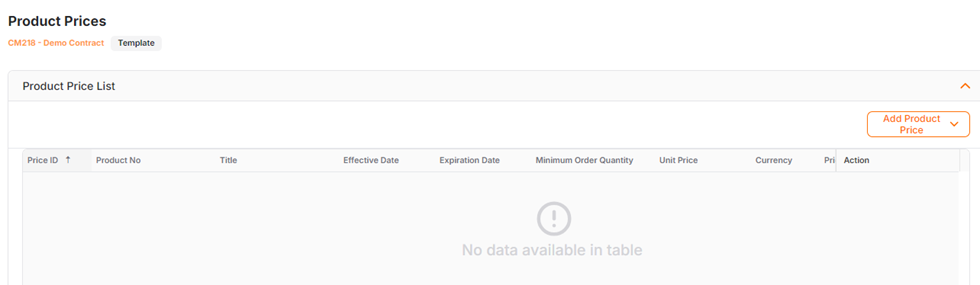
After clicking the "Add Product Price" button, products can be added to the contract using the methods "Add Price," "Select Price," or "Import from Result Document" on the screen.
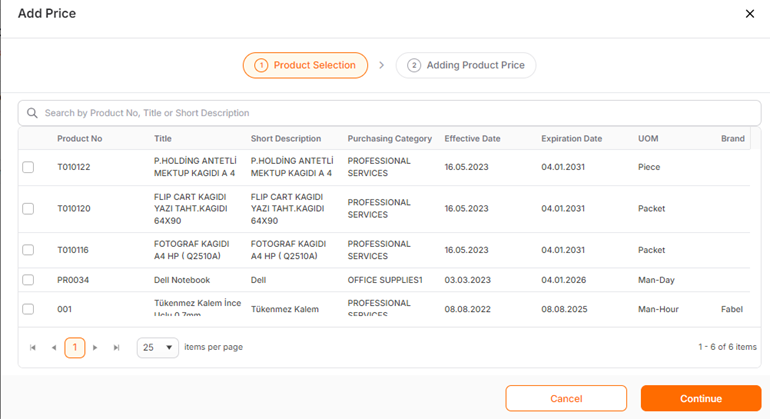
Add Price
This is the section where price information is added to the contract. After clicking "Add Price," you will encounter a two-step process.
Product Selection
On the opened page, select the product to which the price will be added. This section displays the products available in the product list.
Adding Product Price
This is the page that opens after selecting a product and clicking the "Next" button. Mandatory fields are indicated with an asterisk. If these fields are not completed, the process cannot be finalized.
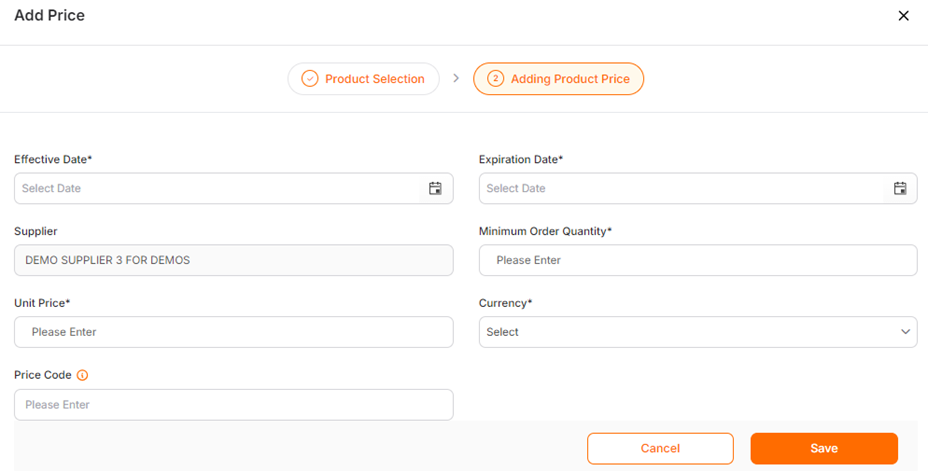
Effective Date: This field should be filled with the initial validity date of the product price. The Initial Validity Date must not be before the date on which the action is taken.
Expiration Date: This field should be filled with the final validity date of the product price. The Final Validity Date must be after the Initial Validity Date and cannot be earlier than the date on which the action is taken.
Supplier (key: Supplier): The supplier selected as the "Counterparty" in the contract will be automatically selected.
Minimum Order Quantity: The minimum order quantity specified for the product.
Unit Price: The unit price specified for the product.
Currency: The list of currencies defined for the company is displayed.
Price Code: This is an optional field. The price code information allows for the retrieval of prices matching the same price code for products added to the catalog.
Select Price
This area lists the product prices defined for the supplier selected as the "Counterparty" in the contract. The product prices are listed if their start and end dates fall between the initial and final validity dates of the current contract.
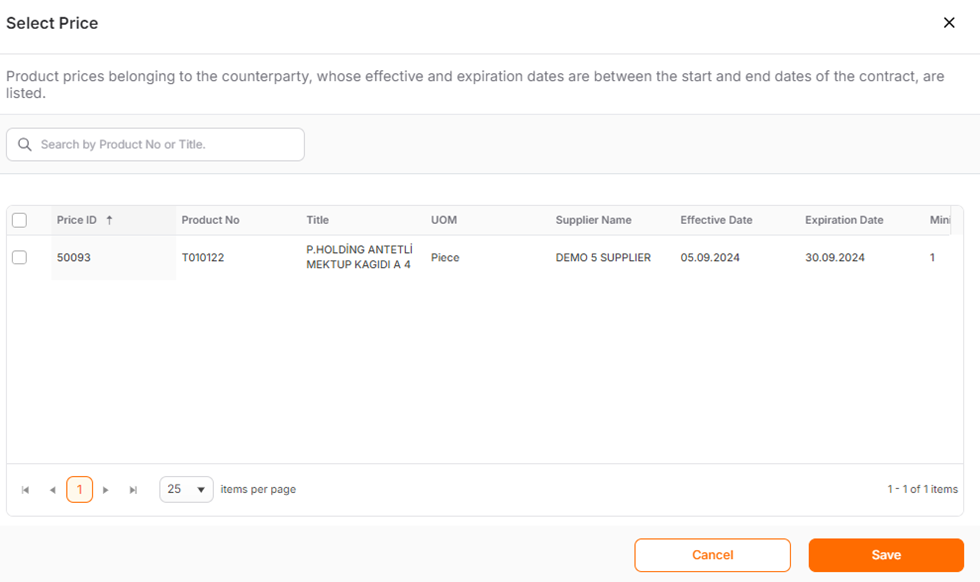
After making a selection, the Save button should be clicked.
To delete a saved product, click the trash can icon under the action column.
To edit saved products, click the Details icon.
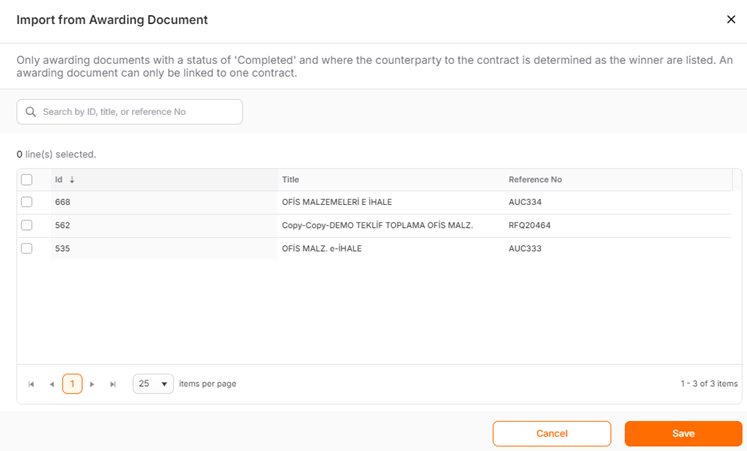
Import from Avarding Document
Only the avarding documents assigned to the supplier selected as the Counterpartyand not included in any other contract are listed in this section. After selecting the relevant result documents, the Save button should be clicked. If the result document contains freetext products, it cannot be added to the contract.
Documents
This is the section where additional documents such as contracts, appendices, etc., can be added. To add a document, click the "Add Document" button.

On the opened page;
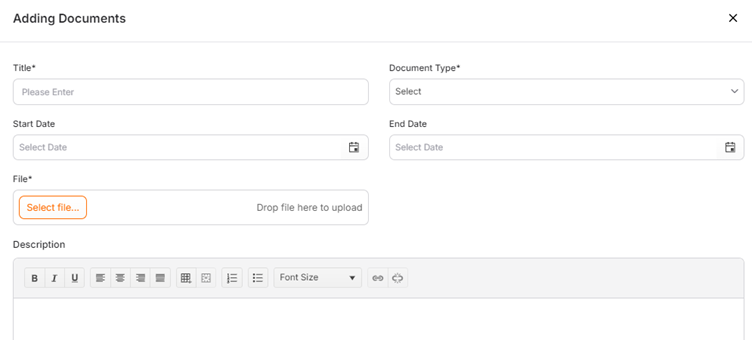
Title: This field is for entering the title information of the document to be added.
Document Type: This field is for selecting the type of document. Options include Contract, Contract Appendix, and Other.
Start Date: This field specifies the start date of the document to be added.
End Date: This field specifies the end date of the document to be added.
Document: Click the "Add" button to select and upload the relevant document from your computer.
Description: This field is for entering a description of the document to be added.
Mandatory fields are indicated with an asterisk. After filling out the relevant fields, click the "Save" button.

You can download the relevant document to your computer by clicking the "Download" icon under the action column.
The "Details" icon is used to edit the document.
The "Delete" icon is used to delete the document.
Reminder and Logs
Reminder
Click on "Contract Records List" on the left side of the screen to display all contracts. Click the Details icon under the Action column on the right side of the contract you want to review.

On the opened screen, at the bottom of the contract information page, there is a "Reminder" tab.

Hatırlatıcı Kur
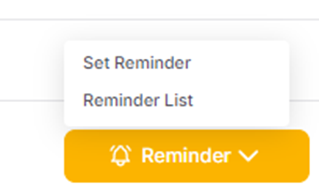
After clicking the "Reminder" button, select "Set Reminder" from the menu that opens.
In the opened window, mandatory fields are indicated with an asterisk. If these fields are incomplete, the "Save" operation cannot be completed.
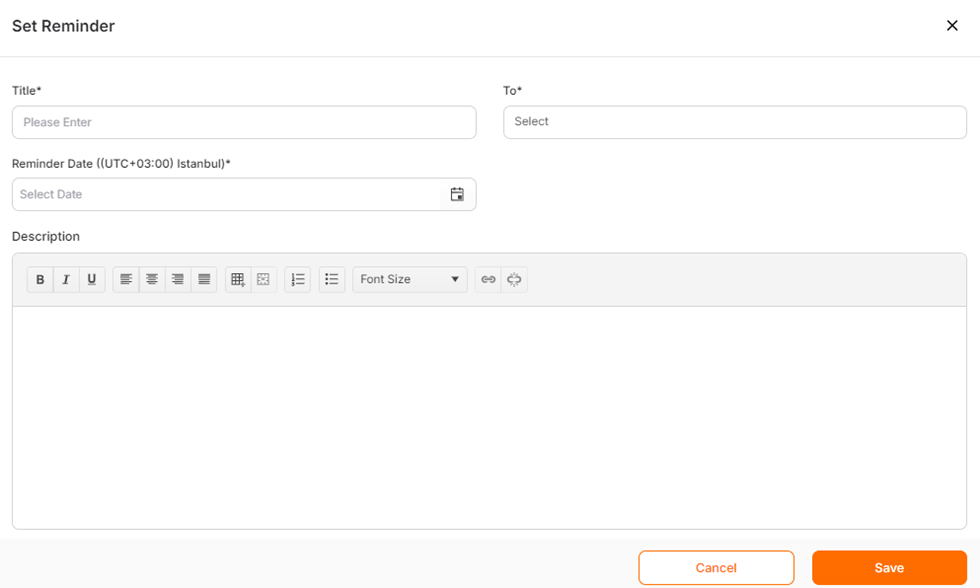
Title: This is the field where you need to enter a title for the reminder. It should be no longer than 100 characters.
To: Clicking this field will display a list of authorized individuals from the parties and counterparties included in the contract. One or more selections can be made.
Reminder Date: Enter the date when the reminder will be active, i.e., when the reminder email will be sent.
Description: This is an optional field. You can enter a description here if desired.
To set the reminder, after filling out the relevant fields, click the Savebutton.
Reminder List
This is the section where reminders set for the contract are listed. After clicking the "Reminder" button, select "Reminder List" from the menu that opens.

On the opened page, the set reminders are listed.
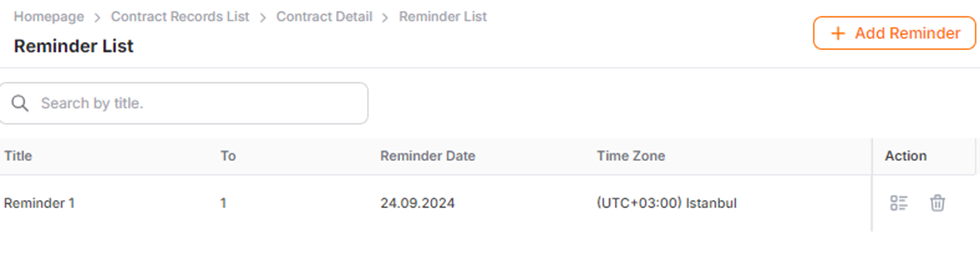
In the action column;
· Details Icon: Clicking this icon provides access to the creation steps of the contract reminder.
- Delete Icon: This icon is used to remove the reminder from the list by deleting it.
Title: This field displays the title of the reminder as set by the recipient user.
To: This field shows the number of users to whom the reminder has been sent.
Reminder Date: This field indicates the date on which the reminder email will be sent.
Time Zone: This field shows the time zone according to which the reminder is scheduled to be sent.
Loglar
The Logs page is where actions related to the contract are recorded in the system. To access this page, click on the "Create Contract" menu under "Contract Management" on the left side of the screen. Then, click the "Logs" button located at the bottom right of the details screen.

In the newly opened tab, the logs are sorted by date.
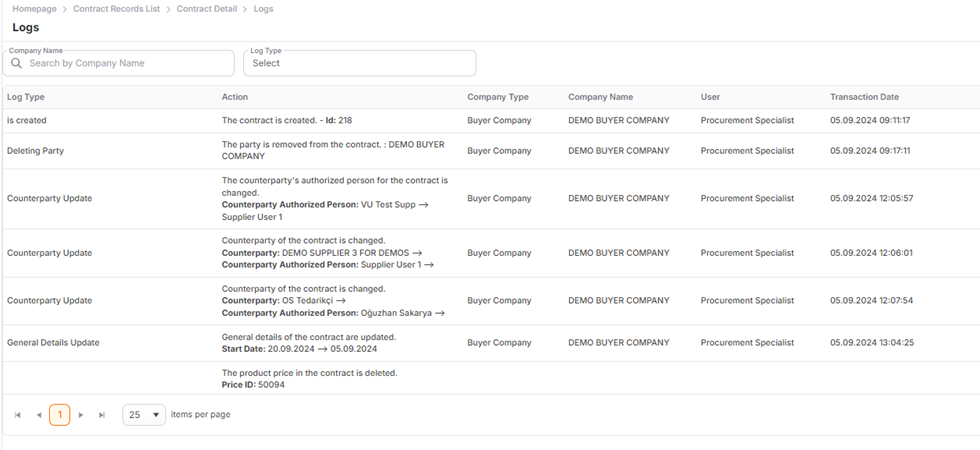
Log Type: Displays the groups of actions based on their types.
Actions: This heading provides details of the actions performed by recipient/supplier users.
Company Type: This heading differentiates between recipient and supplier.
Company Title: Shows the registered title information of the supplier/recipient in Promena.
User: Displays the information of the user who performed the action under the registered company. For supplier users, it includes the username, IP address, and browser information.
Transaction Date: Shows the date, time, and second of the recorded action.
In the top-right corner of the page, you can view the search field and other shortcut icons.

- Customize: Used to temporarily hide columns that are not desired to be displayed.
- Export: Used to export the list to Excel.
- Print: Used to print the page in its current view.

In the Contract Details tab, filtering in the logs section can be done in two ways: by Company Titleand by Log Type.