Line Items - Adding Columns to Price Table
You can add item(s) / service item(s) to your Request for Quotation (RFQ) and e-Auction events from Line Items page. Firstly, please click on the Line Items page in your event menu.
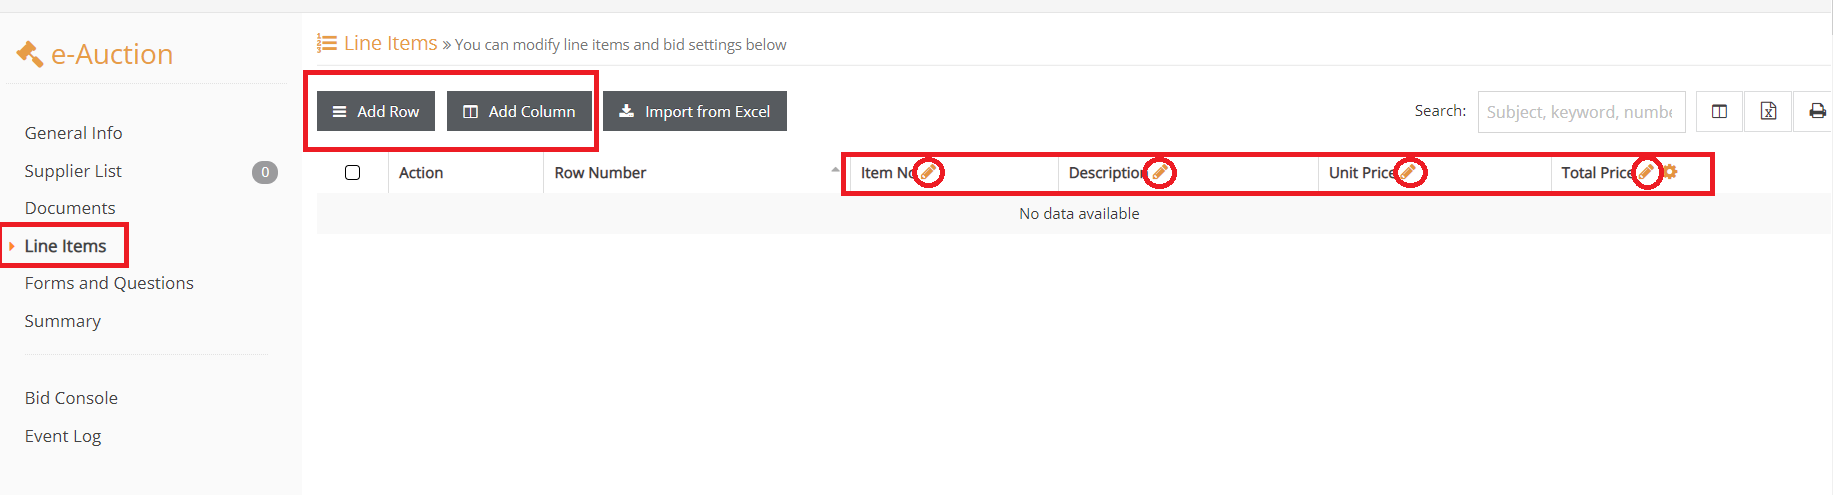
To add a new item to the event, please click to Add Row button, or click to Add Column button in order to add a new column to the price table.
Note: If you are going to make changes on the price table, please add columns firstly and then start to add your items.
In the price table, there are the Line Number, Item No, Description, Unit Price and Total Price columns by default. You can make column updates by clicking on the edit icon next to column names.
Adding Column
In your RFQ and e-Auction events, you can customize the price table according to your purchase project requirements. By this way, you can flexibly manage many different kinds of purchasing activities on Promena system.
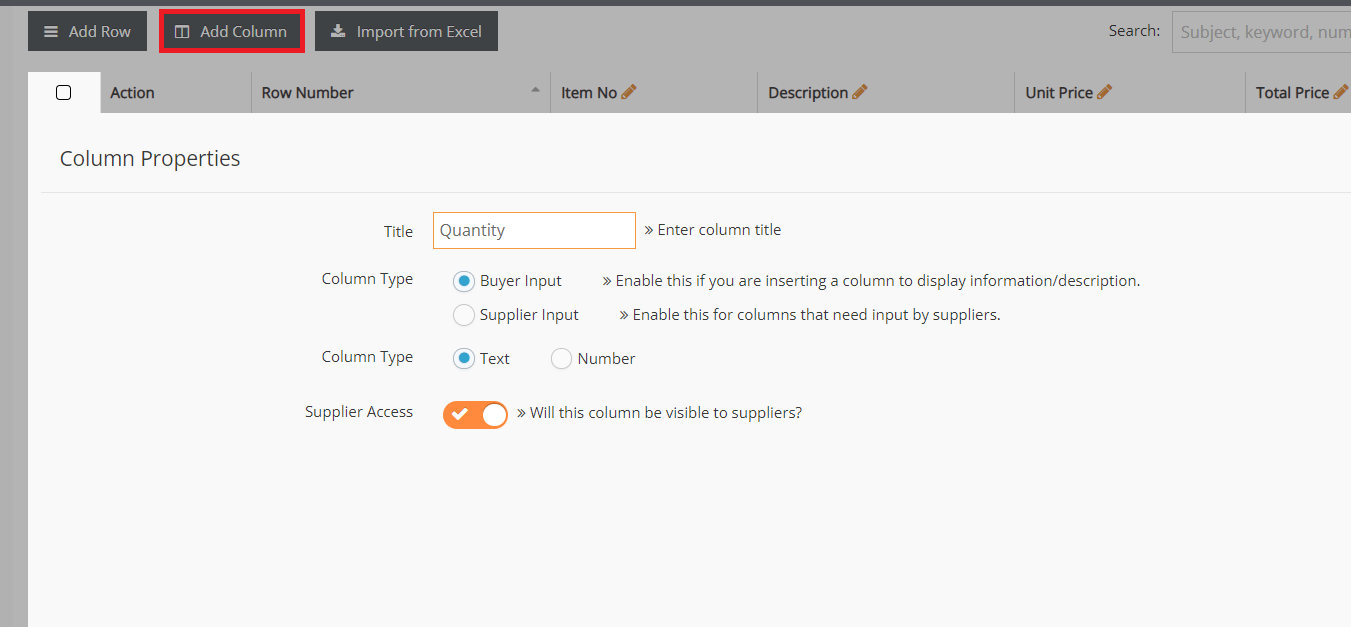
Please click to Add Column button to add a new column to your table. You will get the following options and selections:
- Info Input: Columns opened for information purposes for suppliers. This column values filled by the buyer side.
Example: When purchasing a notebook, the processor, RAM, color and the other properties can be opened as information columns.
Text or Number can be selected as field type. If Supplier Access is active, this column will be displayed by the suppliers. After you have done your edits, click the Save button at the bottom right.
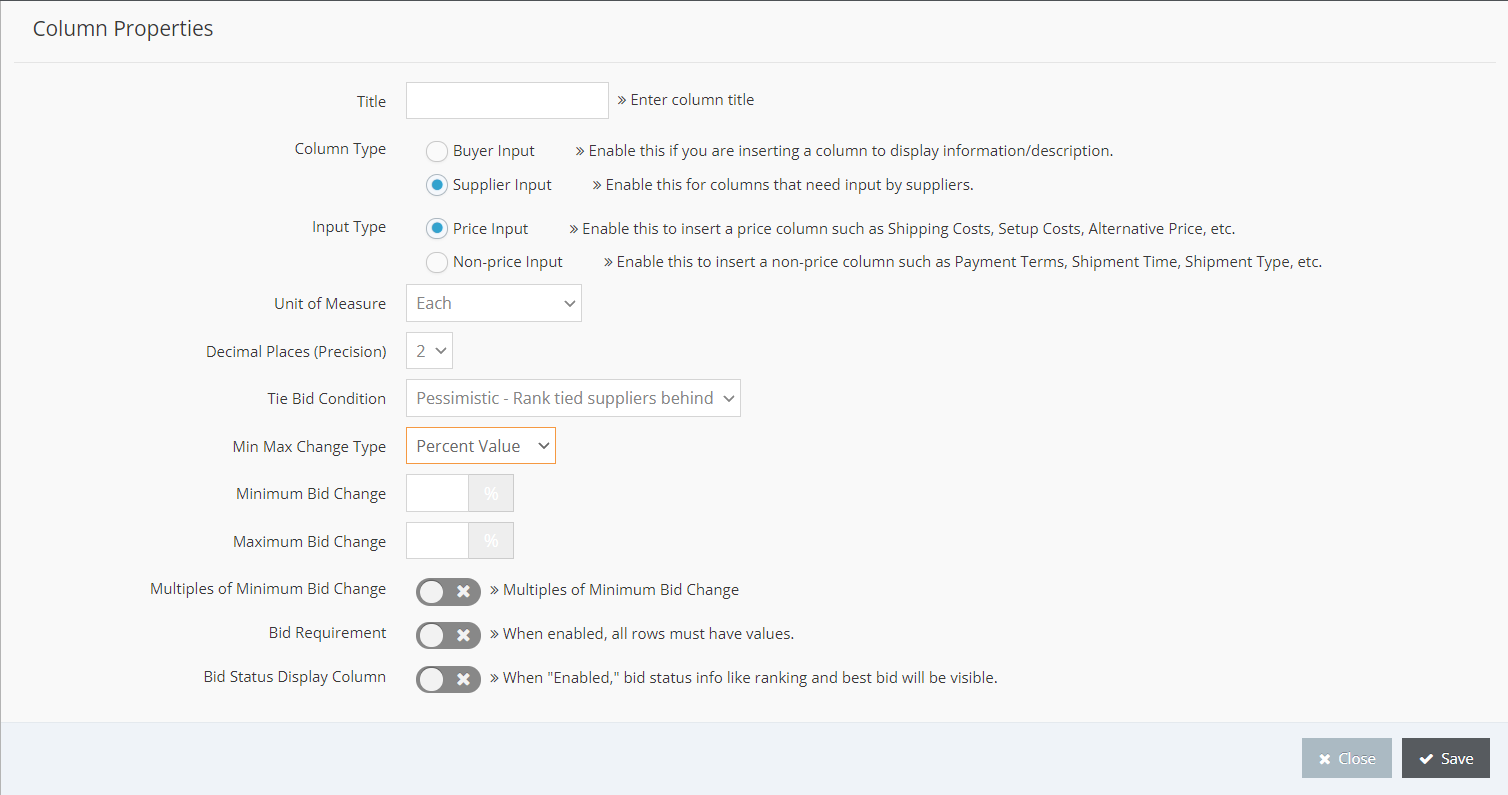
2. Supplier Input: Columns opened for supplier inputs. This column values filled by the supplier side.
Example: When purchasing a notebook, price and non-price supplier columns such as Service Fee, Payment Vault, Delivery Time can be opened to suppliers to be filled.
Price or Non-Price input can be selected as the input type.
- If the input type is Price Input, price column properties should be determined.
- If the input type is Non-Price Input, data type can be Text or Number.
After you have done your edits, please click the Save button at the bottom right.
Once you have added columns, you can change the order of the columns by drag and drop.
Note: Adding an item row to the price table is described in another support article.
To access other pages related to your event, please click on the corresponding link in the event menu on the left side of the screen.