Project Management
Create Project
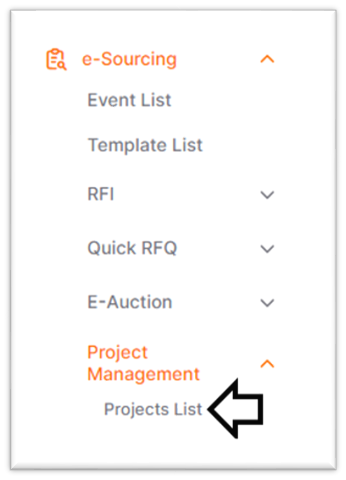
You can create a Project to manage and track the processes you carry out on the Promena platform. To access the Project Creation area, you need to click on the Project List heading under the Project Management menu located under the e-Sourcing subheading on the left side of the screen.
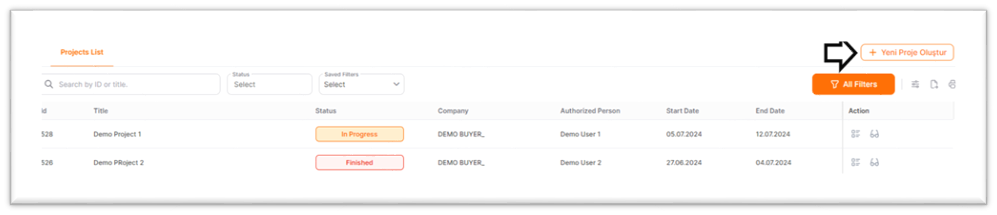
To create a new project, you need to click the "Create New Project" button located in the upper right corner of the screen.
On the page that opens, the fields marked with a star are mandatory and must be filled in.
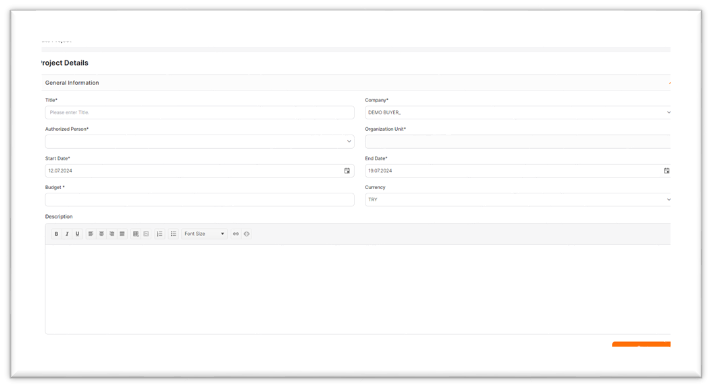
· Title:This represents the title of the project.
· Company: This represents the company to which the buyer is affiliated.
· Authorized: This refers to the project responsible person. Depending on the role, the authorized person can be selected from the users under the buyer company.
· Organization Unit: It represents the organizational unit within the system where the authorized person is affiliated. It is automatically fetched by the system.
· Budget: This is the field where the project budget is entered.
· Start Date: This indicates the start date of the project.
· End Date: This indicates the end date of the project.
· Description: This represents the field where a description related to the project details can be entered.
All fields are filled out, then you click the "Save" button, and a new project with a new ID number is created in the "In Progress" status.
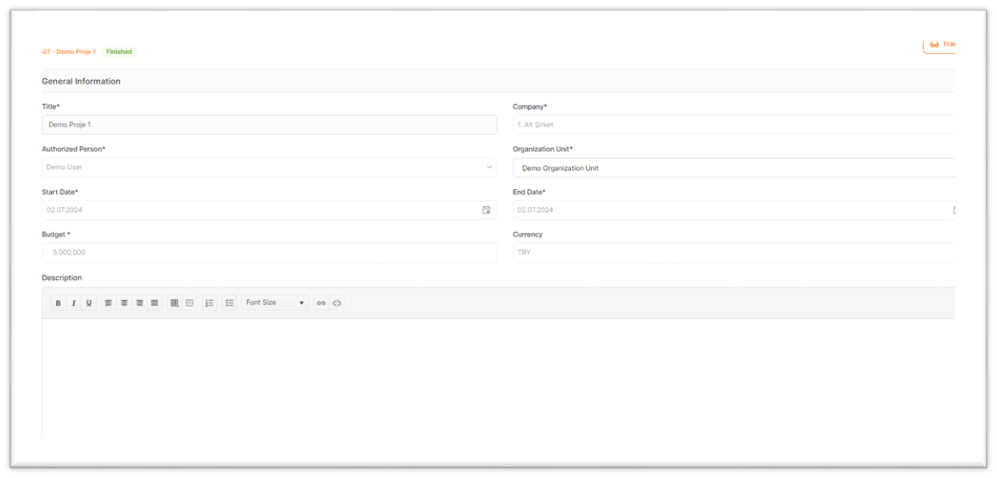
At the bottom of the page, the sections such as "General Information," "Processes," "Project Team," "Milestones," "Tasks," and "Documents" should be filled out to complete the project details.
The information filled out in the initial stage forms the "General Information" tab. Changes can be made in this tab, and to save the changes, you need to click the "Save" button located at the bottom right of the screen.
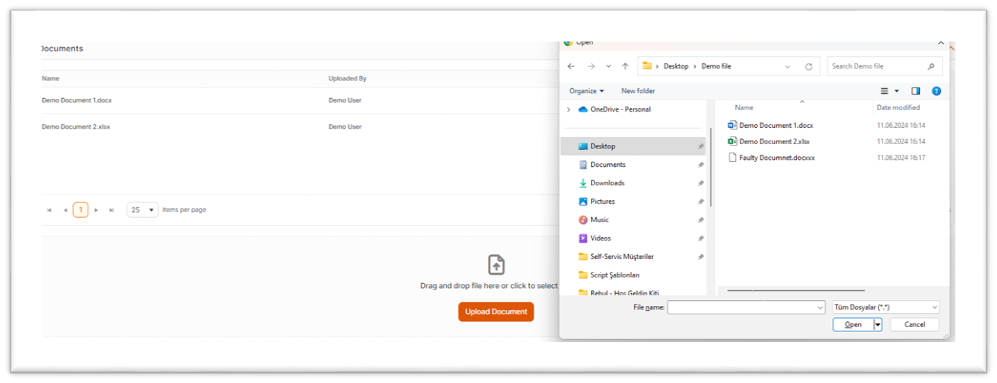
Documents
When you move to the Documents step, it is the area where project-related documents can be added. Documents can be added by clicking on the relevant area or by using the drag-and-drop method.
Project Team
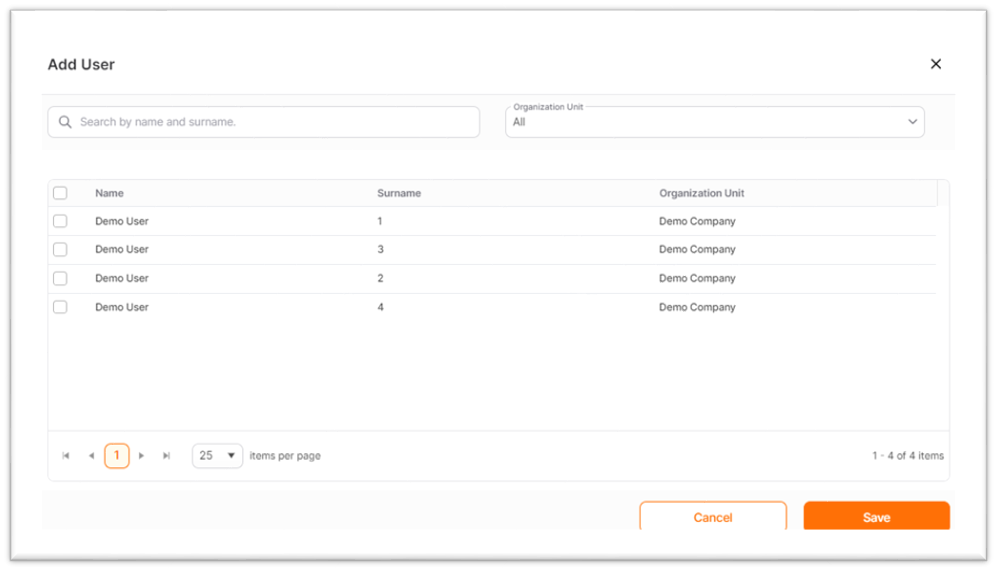
In the Project Team step, the project team is created by adding users in accordance with the authorized people defined under the buyer company. To add a person to the Project Team, click the Add button located in the upper left corner.

On the page that opens, the users under the buyer company are listed. You can search by Name, Surname, and Organizational Unit fields at the top of the list. After adding the authorized people, you need to click the Save button.
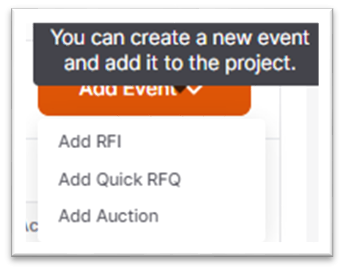
Events
In the Processes step, the page that opens will allow you to define the sourcing processes to be added to the project. You can either select from the existing processes or create a new process to add to the project.
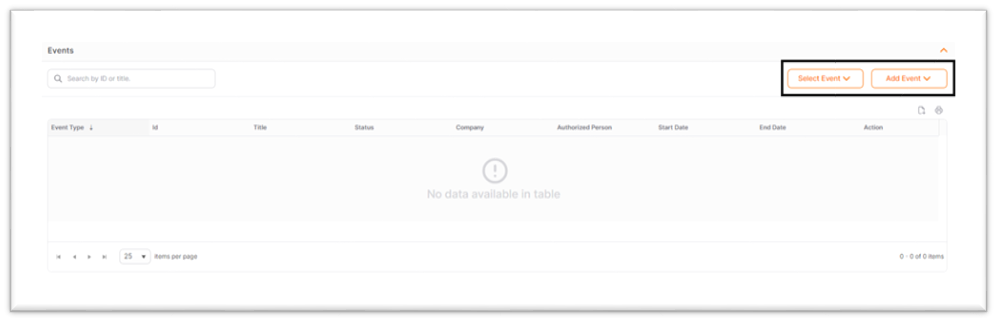
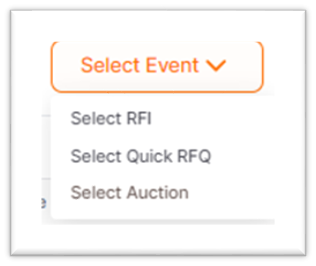
· Select Event:This button is used to add processes to the project by selecting from the existing processes. These processes can be RFI, RFQ, or Auction. On the page that opens, select from the processes under the buyer company and click the Save button. At this stage, any process can be added to the project.
· Add Event: On the page that opens, you can add a new process to the project by creating it. When you click the Add Process button and select the process type, the creation screen for the respective process will open. Once the process is created during the setup phase, it will be automatically added to the project.
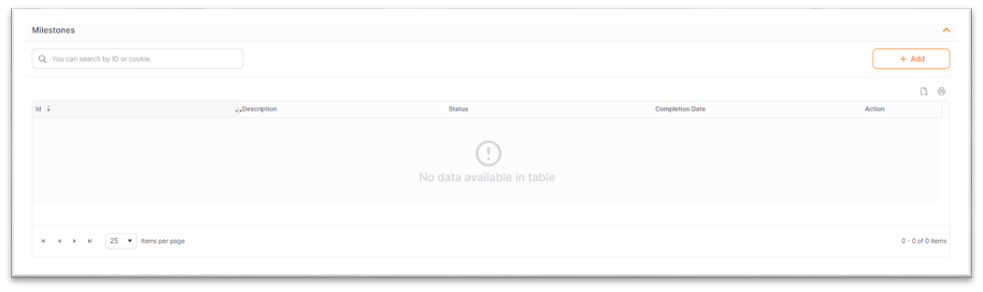
Milestones
When you move to the Milestone step, you can list important phases and turning points for the project. To add a Milestone to the project, click the Add button located in the upper right corner.
On the page that opens, the fields marked with an asterisk are mandatory and must be filled in. After entering the relevant information, click the Add button located at the bottom right.
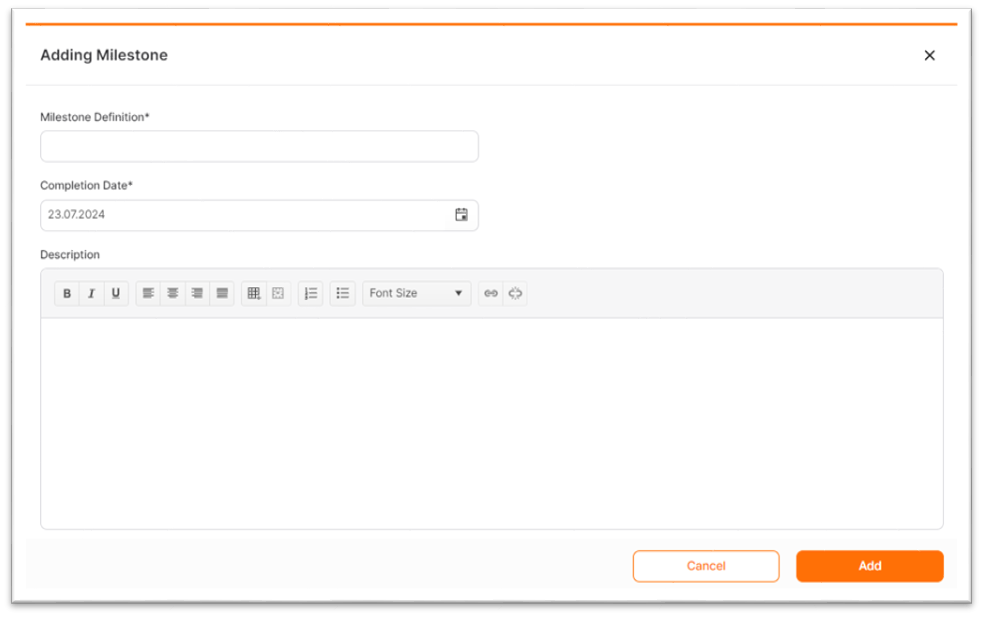
· Milestone Definition: This represents a milestone for the project.
· Description: This represents the description of the milestone.
· Completion Date: This represents the completion date of the milestone added to the project.
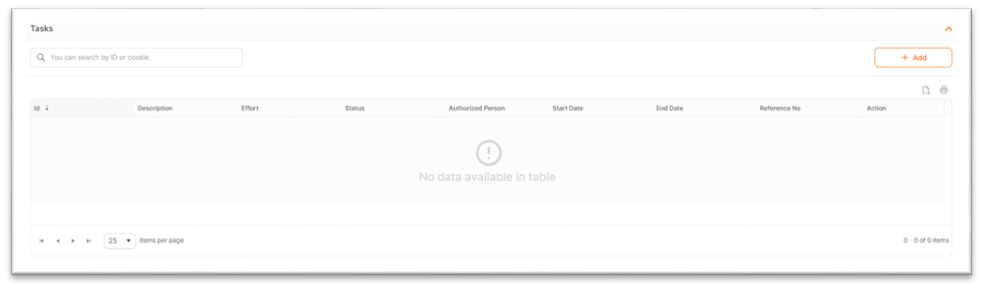
Tasks
When you proceed to the Tasks step, tasks related to the relevant milestones and the responsible people for those tasks can be added to the project. To add tasks and assign responsible individuals to the project, click the Add button located in the upper left corner.
On the page that opens, the fields marked with an asterisk are mandatory and must be filled in. After entering the relevant information, you should click the "Save" button located at the bottom right to add the task.
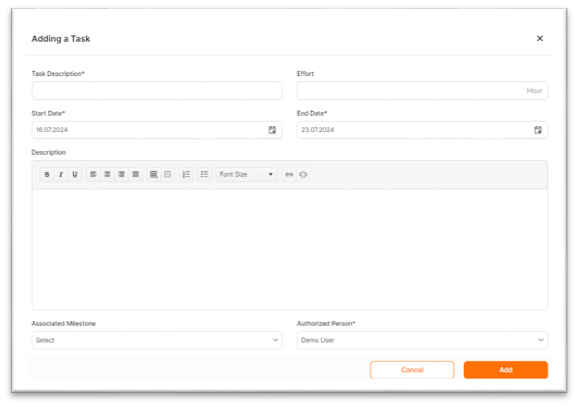
· Task Description: This represents the field where the description of the task related to the project is provided.
· Effort: This represents the field where the effort or duration of the task can be entered in hours.
· Start Date: This represents the start date of the task.
· End Date: This represents the end date of the task.
· Description: This represents the description of the task.
· Associated Milestone: This represents the milestone associated with the task that could be included in the project.
· Authorized Person: This represents the selection of the person responsible for the task.