(Buyer) Create Quick RFQ - Participant List
To proceed to the Participant List step, the relevant areas must be filled in the "Line Item List" step, and the "Continue"button must be clicked.
The Participant List page is where suppliers invited to the relevant event are added.
At this stage, you can add both companies from your company's participant list and companies that are members of the supplier discovery to the event.
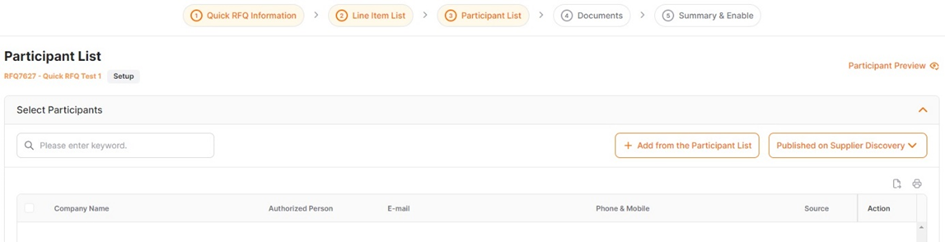
To invite suppliers from the Buyer Company's supplier list to the event, click on the "Add from Participant List" button.
On the opened screen, all suppliers listed under your company's defined participant list are displayed. You can search based on specific criteria using the search section on the left. You can filter by Supplier Status, Category Status, and Brand information.

By clicking on the "Detailed Filter" located on the right side of the screen, you can open the detailed filter area. From there, you can filter by category name, country, state, and city information.
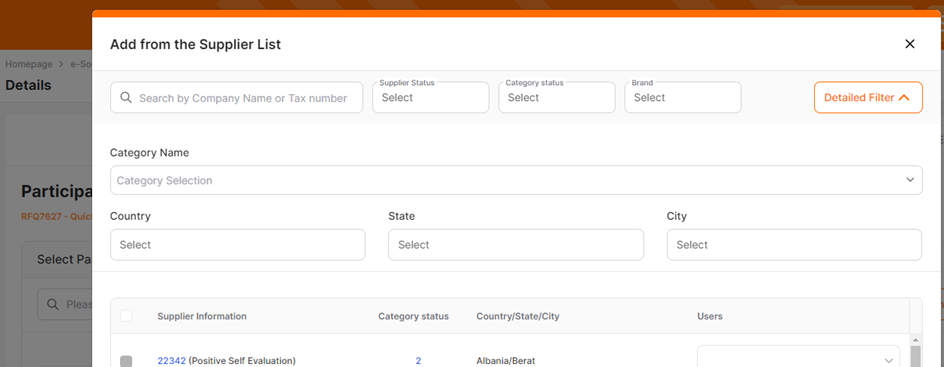
- Search Area: Allows you to search by company name, tax number or short name entry.
- Supplier Status Area: You can search based on the supplier status structure created for your company.
- Category Status Area: Enables searching based on the status of the categories to which the relevant supplier is affiliated.
- Brand Area: Brands created by buyer companies for their defined products can be assigned to suppliers. By typing the relevant brand with the brand filter, you can list the suppliers associated with that brand.
- Category Name: You can search based on the category list defined for your company. The Categories area allows manual entry and selection from the defined category tree.
- Country/State/City Selection Areas: Used for searching by region.
Multiple filters can be applied simultaneously. To remove filtering, click the Clear button at the bottom left of the screen.
Supplier information includes company name, supplier status, associated categories, category status, address information and supplier user information.
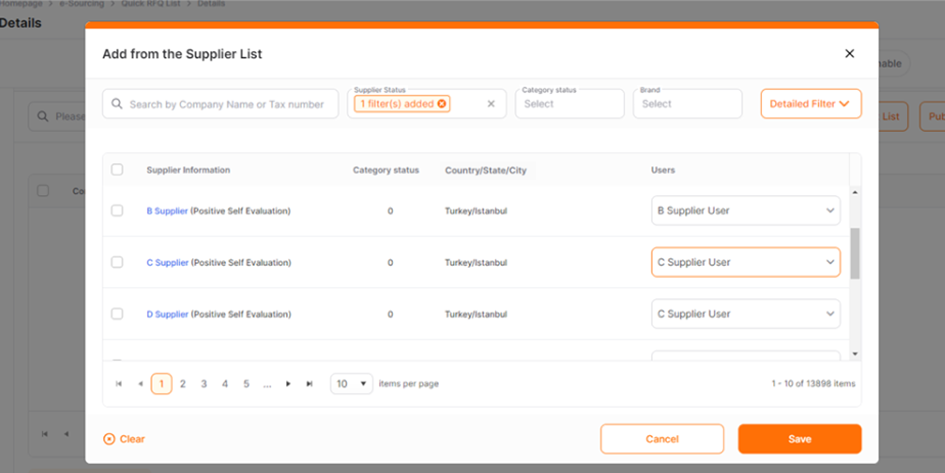
The users section lists the users assigned to the supplier card.
To add the selected Supplier to the event, you need to select the relevant supplier and check the Users area, then click the Save button.
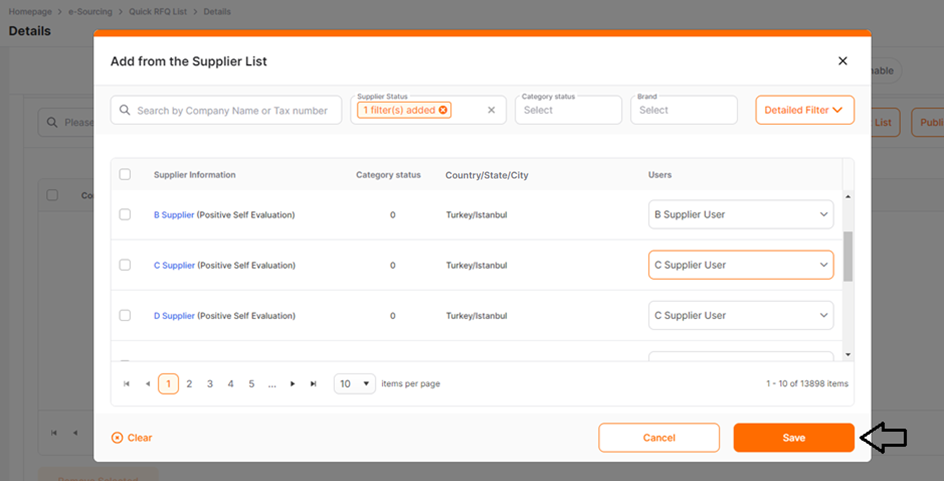
Without saving the changes, you can click on the cancel button to exit.
Another option to add suppliers is through the Promena Supplier Discovery pool. In the Promena supplier discovery pool, suppliers who are members of the supplier discovery are listed. Member suppliers register themselves to the supplier discovery categories in order to receive invitations to the relevant events.
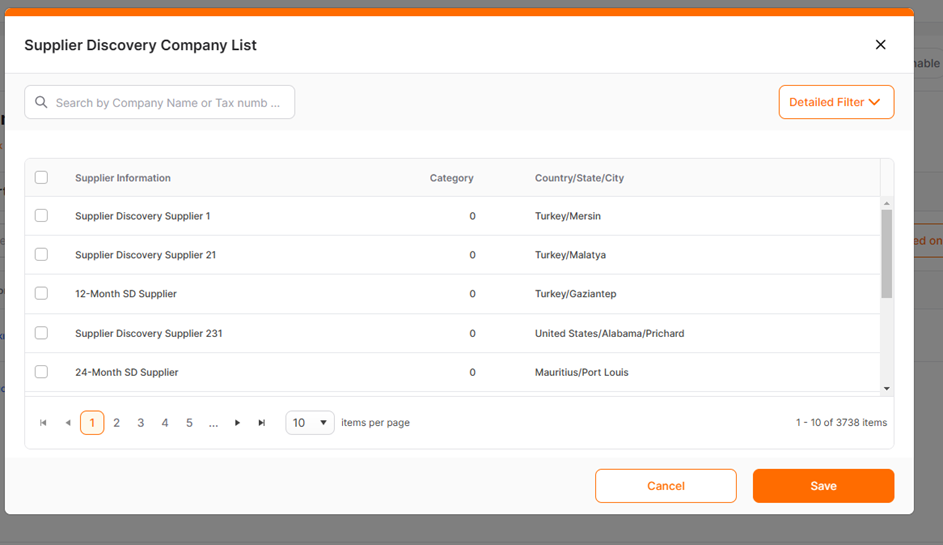
To invite specific suppliers to the event by selecting from the Promena supplier pool, click the "Published on Supplier Discovery" button and select "Selected Suppliers"or "Selected Categories".

When the "Selected Suppliers" area is chosen, you can search by company name or tax number in the opened screen. Filtering by category, country, state, and city information can be provided from the "Detailed Filter" section located in the top right corner of the screen.
After selecting one or more suppliers, the "Save" button should be clicked.
When the "Selected Categories" area is selected, the supplier discovery category tree is listed on the opened screen. After selecting the relevant category suitable for the event topic, click on the Save button.
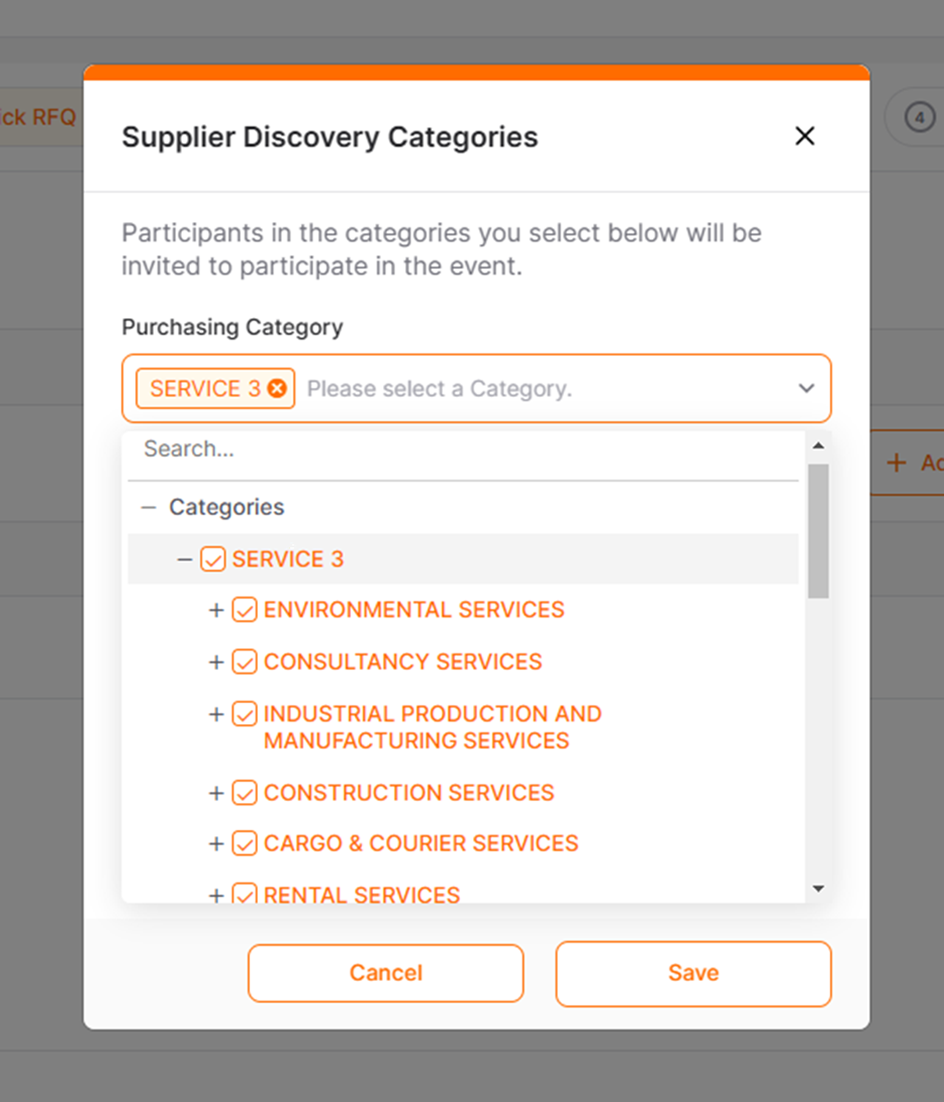
The selected categories are listed at the bottom of the page under the title "RFQ Supplier Discovery Categories".

After selecting one of the Published on Supplier Discovery actions, the other action cannot be selected. For example, after adding a supplier with the "Selected Categories" action, supplier selection from the Discovery Companies cannot be made with the "Selected Suppliers"action. In this case, all categories in the "RFQ Supplier Discovery Categories" area should be deleted, and the action should be reset.
The Continue button is used to proceed to the next step. To switch between completed steps, the title of the relevant step can be clicked on in the "Steps Line".