Creating a PO
Creating a PO from Scratch
One of the preferred methods for creating a purchase order in the Promena system is the "Creating a Purchase Order from Scratch" method.
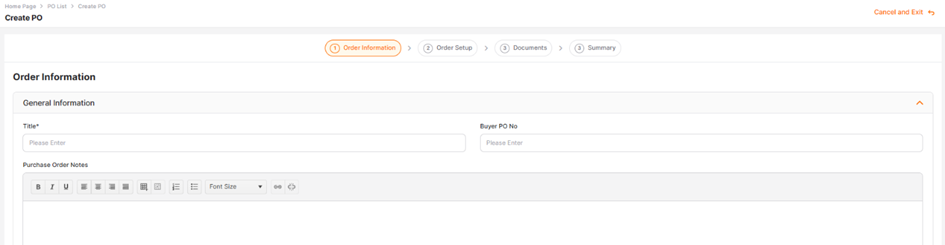
In the newly opened page, click on the Create PO (Purchase Order) button located at the top right corner of the screen to complete the necessary steps for the purchase order.

On the newly opened page, only the areas marked with a star are mandatory to fill in. The encountered areas on the page include:
· Title: This is a mandatory text entry area where the subject of the purchase order can be written. The purchase order title must be longer than 4 characters and shorter than 50 characters.
· Buyer Purchase Order Number: This is an optional text entry area used to write the purchase order number defined in the buyer's ERP system, in case of integration with the buyer's ERP system.
· Purchase Order Notes: This is a text entry area where notes related to the purchase order can be written. The notes entered in this area are visible to the Supplier selected in the purchase order.
· Supplier: This is a mandatory area where the supplier for the purchase order is selected.
· Supplier User: This is a mandatory area where the supplier user for the purchase order is selected. The user information selected as the Purchase Order User in the Supplier Details -> Users tab is automatically reflected here. The purchase order notification email is sent only to the user selected in this area. The supplier user can be viewed on the Purchase Order Management page by all users listed in the purchase order selection list.
· Currency: This is a mandatory area where the currency in which the purchase order amount will be calculated is selected. The default currency defined under the Buyer is automatically displayed. All currencies assigned to the Buyer are listed in the selection list.
· Purchase Order Terms: This is an area where the terms of the purchase order can be selected. If there is only one Purchase Order Term defined under the Buyer, it is automatically displayed. All purchase order terms defined in the Company Details -> Purchase Order Terms tab are listed with their title information in the selection list.
· Authorized Person: This is a mandatory area where the purchase order representative is selected. All users defined under the Buyer are listed in the selection list, with the default value being the user performing the transaction.

By filling in the areas, click on the Save and Continue button located at the bottom right section of the screen. The purchase order is created in the Setup status and is assigned a unique purchase order number.
In the Order Information page; details related to the created purchase order can be viewed, and changes in the purchase order can be made to the purchase order while it is in the Setup status.
The items of the purchase order can be edited from the Line Item List page during the Order Setup step. Depending on the buyer company's roles or the authorisations the user, the following three options will be displayed:

Add Product: In the opened window, the priced product list of the supplier selected in the general information section is displayed. To add a product to the request, click the Add Product button located at the beginning of the row.
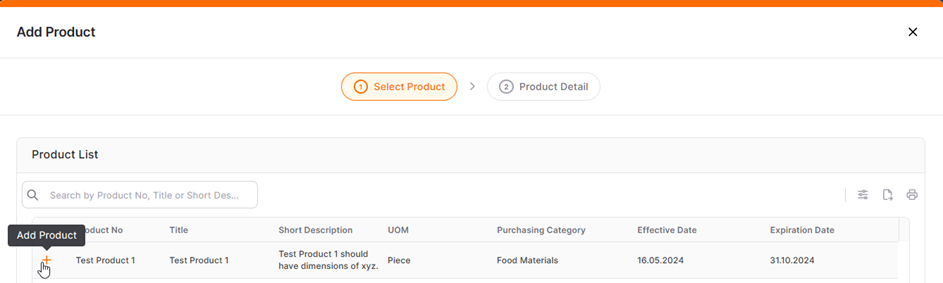
On the Product Detail page, fill in the mandatory areas and click the Save button.

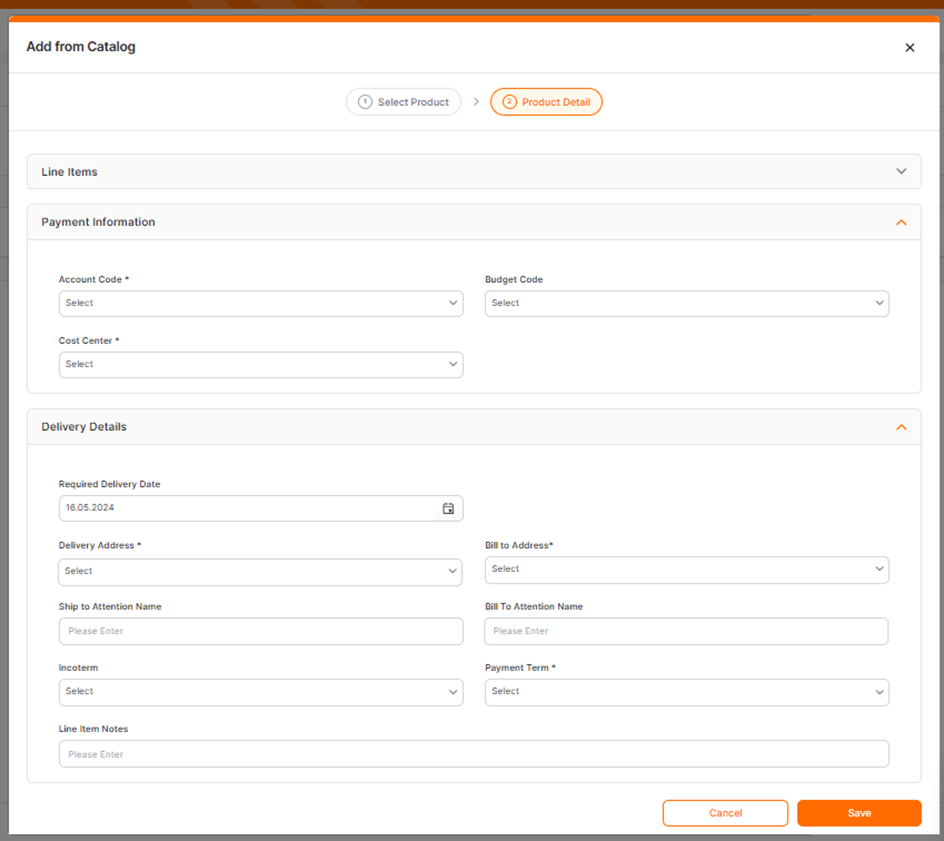
· Add from Catalog: In the opened window, the Catalog area displays a list of catalogs that the user can view. By selecting a catalog, can view a product list with defined price belonging to suppliers from the Select Product section for the chosen catalog.
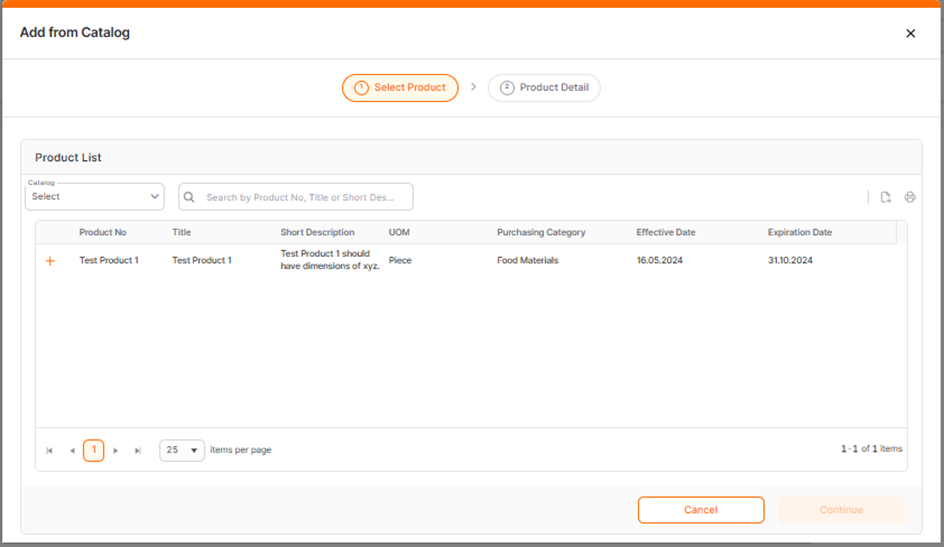
The desired product can be added to the purchase order after clicking the Add Productbutton, filling in the mandatory areas on the opened page, and clicking the Save button.
· Add Free Text Item: This is the option where the informations of to the item want added to the request are entered manually.
For all products added from the catalog, the product list or as freetext, the following window opens. Only for items added as freetext, all areas display will be editable.
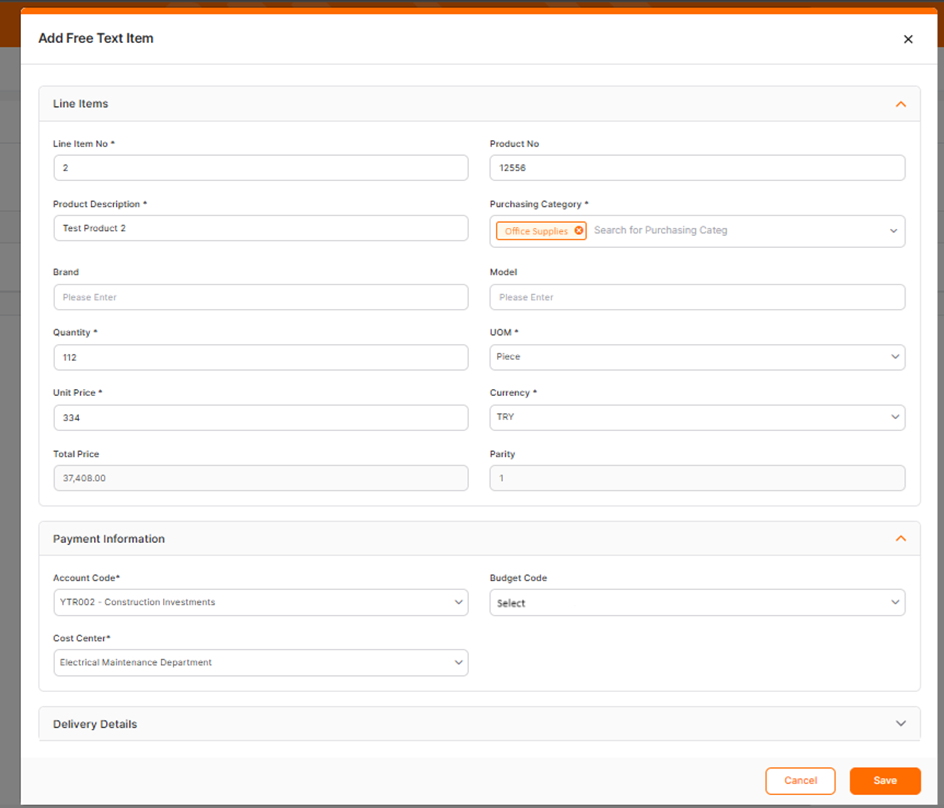
Note: For priced products added from the catalog or product list, areas such as Product Description, Product No, Unit Price, Currency, Purchasing Category, Unit of Measure and Parity are when come to automatically populated, for items added as Freetext, these areas are open to intervention by the user creating the purchase order.
Enter the Ship to Attention Name and Line Item Notes information for the item and click the Savebutton.
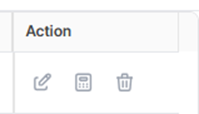
If the item information needs to be updated, click the item icon under the Action column, make the necessary changes, and save them. If the purchase order item needs to be deleted, click the bin icon to delete the item.
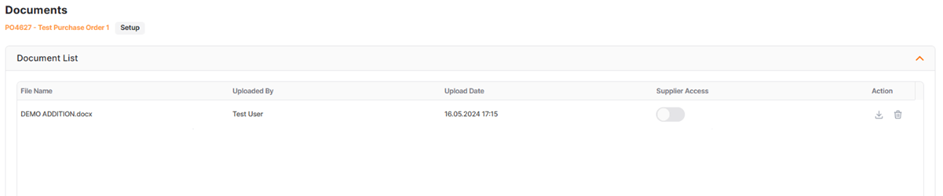
To add a document to the purchase order, open the Documents step, click the Upload Document button and select the required file from the computer, then confirm it.
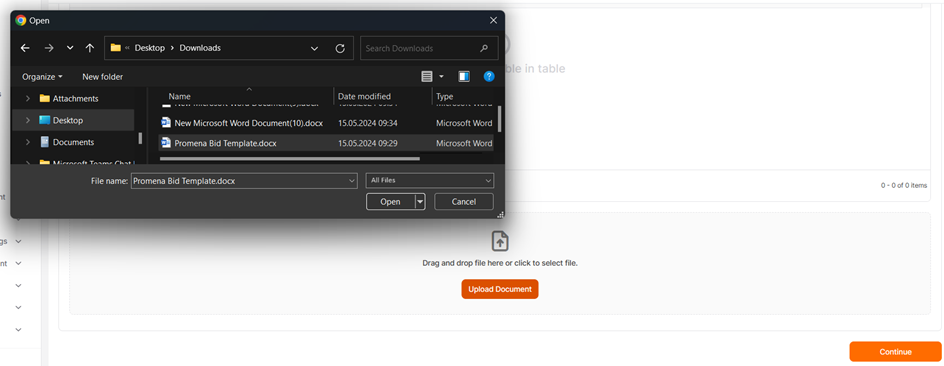
The name, upload date and name of the authorized who uploaded the document can be accessed. To delete the uploaded document, click the bin icon; to download it to the computer, click the download icon. Whether the document can be viewed by suppliers can be decided by enable / disable the button in the Supplier Access column. If enable, suppliers can view the documents; if disable, suppliers cannot view the documents.
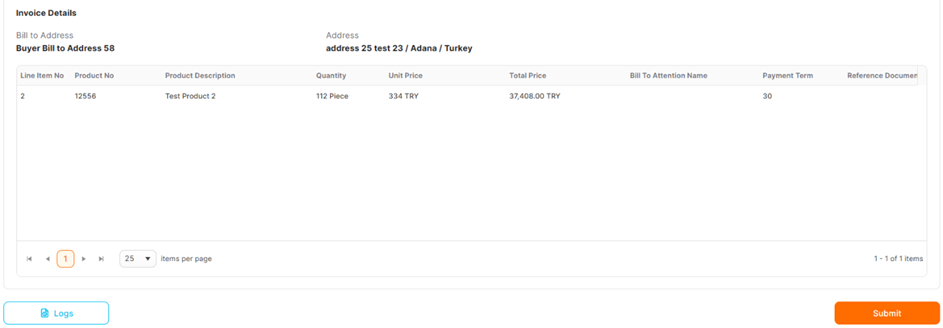
In the Summary step, the information created within the purchase order can be viewed in a general overview. By clicking the Submitbutton at the bottom of the page, the purchase order can be sent to proceed through the necessary approval stages.
Note: Purchase orders that remain in the Setupstatus can only be viewed by the user who created the purchase order and if it includes an approval chain, it means it has not been sent for approval stage in any way. The purchase order status must be advanced by clicking the Submitbutton in the Summary menu.
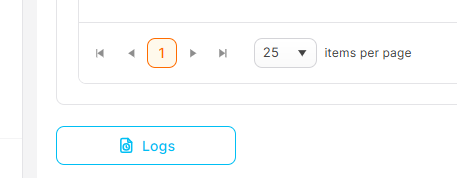
There are two ways to access the Log page. The first is by clicking the Logs button located at the bottom left of the Purchase Order Summary page;
The second is by clicking the Logs icon under the Action column in the Purchase Order List area.
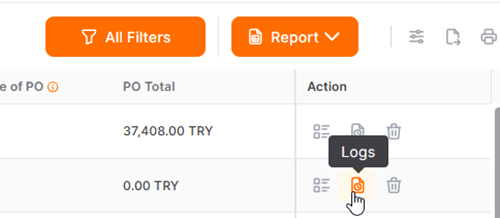
From the Logs page, you can view the types of actions taken on the purchase order and their timestamps. The names of the authorized who approved the relevant purchase orders and the approval date information can also be viewed from this area.

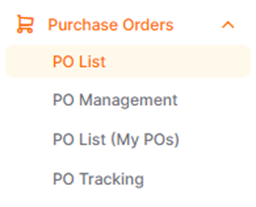
The PO's that were created are listed in the PO List page. For further information click the link below.
 Promena
The PO's that are in "Sent To Supplier" status could be followed from the PO List (My POs) page. For further information click the link below.
Promena