(Buyer) Quick RFQ Template List
The template list fictionalized for the customization of the standard item structureaccording to the needs of the buyer company.
In the Quick RFQ item structure, there is no feature to add columns, but through the pre-prepared templates, the desired item structure can be quickly fictionalized during setup stage.
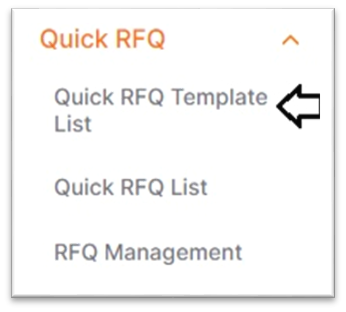
Quick RFQ Template Listis located in the left menu.
When we click on the Quick RFQ template list, you can display all templates created by all users of the Buyer company in the list.
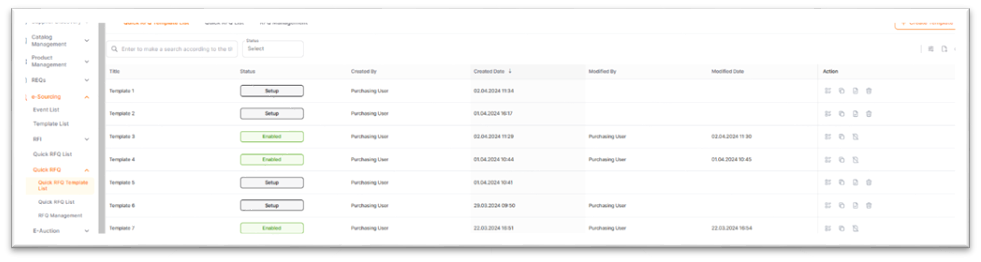
In the upper left part of the page, you can display the search area where you can search by template title and the status area where you can filter.
Search Area: Allows searching by keywords.
For example, to search by title, you can enter a keyword in the relevant area.
Status Information: This field is used to filter templates based on their status.
You can display other shortcut icons in the upper right part of the page.
Column Settings: Used to edit the columns that are wanted/unwanted to be displayed.
For example, when the created date is not wanted to be shown in the list, the relevant area can be temporarily removed from the list. When the page is updated, the list will return to its original condition.

Export: Used to export the list to Excel.
When the relevant button is clicked, the file can be downloaded by selecting from the page that opens.
Print: Used to print the page with the current view.
When the relevant button is clicked, the preview page is displayed in a new tab.
Sorting can be done according to all column names in the list. For example, to sort by Created date, simply click on the relevant title. Sorting direction can be changed.
In the Action column on the right of the screen; there are actions that vary depending on the status of the template.

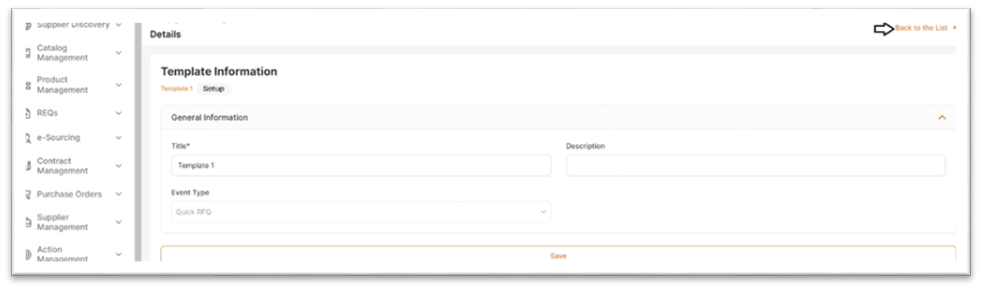
When we click on the Detail icon, the General Information and Columns areas open.
General information area includes Title, Description and Event Type information. In case of setup, this area can be changed and saved in the templates.
In the Columns area: Used for displaying the columns created within the template, adding new columns, deleting them and making changes. In both Enable and Disable states, existing columns can only be displayed. Adding new columns, deleting and making changes are not possible. New columns can be added and the sorting can be changed during the setup stage.
Copy icon: Used to copy the template with available columns. The copied template is in setup state and is enabled by adding new columns, deleting, and making changes.
Enable icon: Used to enable templates that are currently disable and in the setup states.
Top of Form
Delete icon: Only available for templates in the setup state.
**When an enabled template is not intended to be used permanently or temporarily, the relevant template can be disabled.
Disable: It is only displayed in Enable status templates. It is used to set the template to the Disable state. Templates set to Disable state cannot be displayed in the Quick RFQ creation stage.
**If you disable the template used in a previously created Quick RFQ, the relevant Quick RFQ event is not affected.
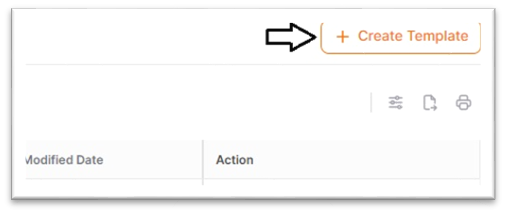
To create a new template; click the create template button in the upper right corner of the screen.
Title and Description information is created to be viewed by all users of the Buyer company.
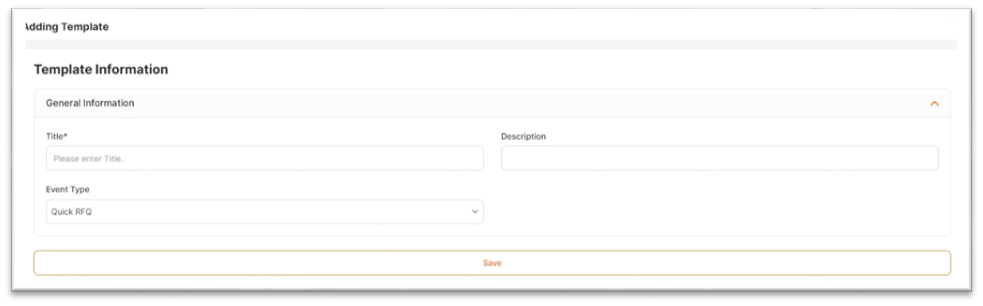
The required areas to be filled in the "General Information" area are marked with an asterisk. If the specified areas are incomplete, you cannot proceed to the next step.
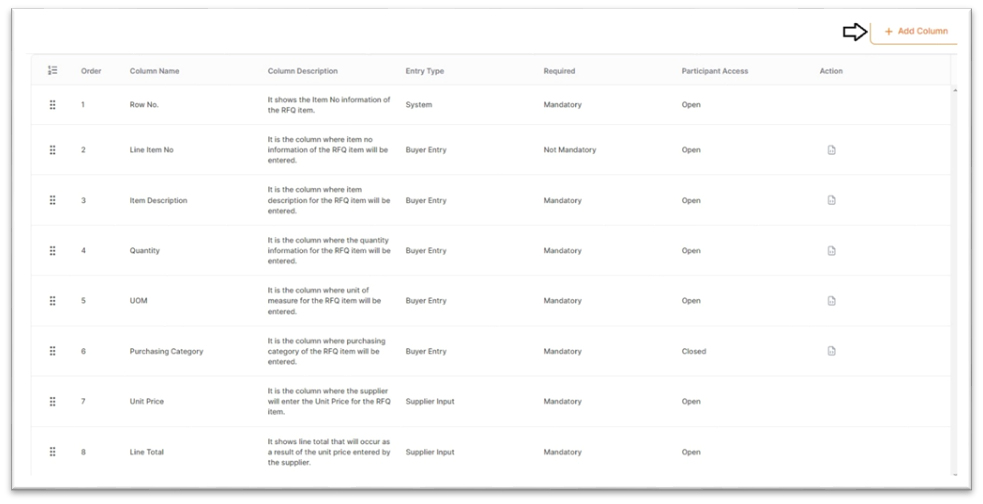
Eight areas that cannot be changed due to the design constraints are automatically displayed on the screen in the column structure. The standard item structure consists of the default columns: Row Number, Line Item Number, Item Description, Quantity, Unit of Measure, Purchasing Category, Unit Price and Line Total, and these areas cannot be altered.
To add new columns, click on the "Add Column" button located in the top right corner.
Entry Type: The area where the information to be entered is specified as either Buyer or Supplier.
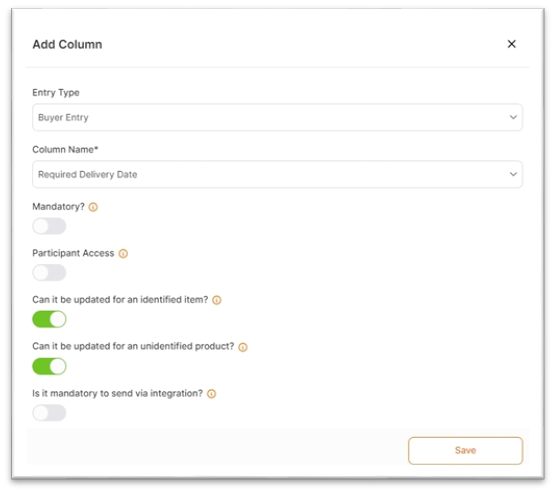
**For example; when you select the "Required Delivery Date" area as the Buyer, you will obtain an area where you can specify the date you want the product or service to be delivered.
Column Name: It is a selectable list that varies depending on whether the entry type is Buyer or Supplier.

Requirement: When enable, the event cannot be published without filling in the relevant area.
Participant Access: Used to display the relevant column by the participant.
Can it be updated for an identified item? This area determines whether the added column for defined products under the Buyer can be updated in the Quick RFQ item step.
Can it be updated for an unidentified product? This area determines whether the added column for undefined products under the Buyer can be updated in the Quick RFQ item step.
Is it mandatory to send via integration? In case the Buyer Company makes sending this area mandatory through integration, the relevant area must be activated. If there is no value in the relevant area during sending from integration, a Quick RFQ cannot be created. An error is returned to the authorized person through integration.
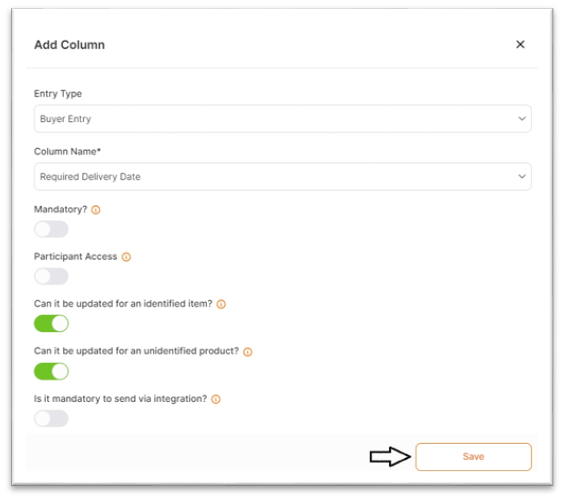
After all areas are filled in as enable/disable according to the need, click on the "Save" button.
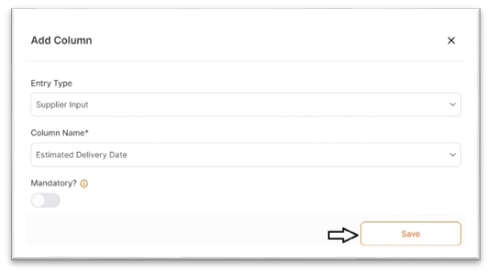
The add button can be clicked again to add a new column. If you want to obtain Estimated Delivery Date information from the supplier, you should select the entry type as supplier input. In this case, the column name is selected as "Estimated Delivery Date". So, you will create an area where the supplier can enter information.
When the mandatory area is enable, suppliers cannot submit their bids without filling in the relevant area.
Click the "Save" button to save the created column.
To change the order of the saved new columns or standard columns, the drag and drop method is used. The relevant column header is selected and dropped to the desired sorting, and then the sorting is saved by clicking the "Save" button.
After the desired additions and changes are completed, click the "Back to the List" button located in the top right corner of the screen to enable the template.
To enable the relevant template, click on the "Enable"icon located in the action column.

Copying: Another method to create a new template is by copying from existing templates.

In all cases, templates can be copied. The copy action located under the action column is used.
The copied template is automatically named. To give it a new name, click on the "Details" icon and changes can be made in the title area.
By clicking on the columns icon, new columns can be added to the copied template, or existing columns created in the copied template can be deleted as desired.
All created enable Templates will be listed under the Template title of the Quick RFQ Information page in the Quick RFQ Creation stage and will be ready for use.
For further assistance, you can reach beneficial guides have been produced for you or contact with our SUPPORT team.
- 1,082 words