Create an English E-Auction - Event Settings - (Step 2)
The event of creating an E-Auction consists of 6 short steps. Completing the Event Settings page is the second step of the event.
To proceed to the Event Settings step, the relevant areas must be filled out in the General Information step, and the Save and Continue button must be clicked.
At this stage, an E-Auction is being created in the Setup state, and a singular ID number is assigned to each event created by the system.
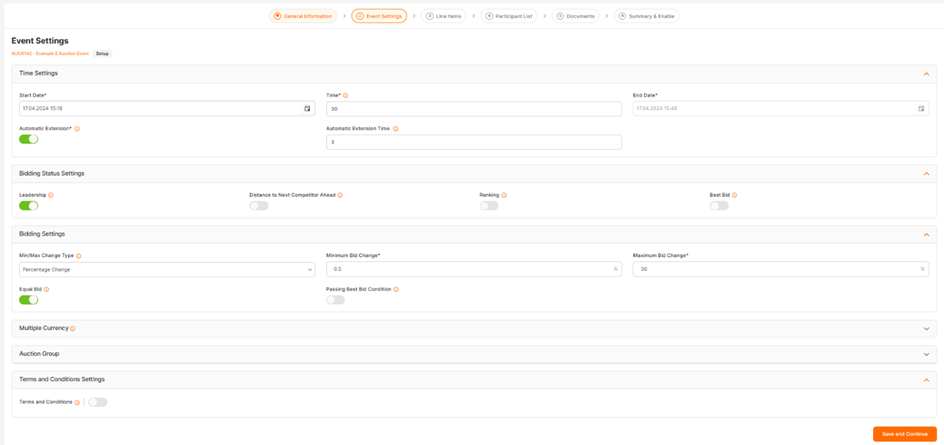
Event Settings page is the area where the specifications regarding the structure of the auction are found. In the Event Settings page, the main title allows adjustments to be made in the following event settings: Time Settings, Bidding Status Settings, Bidding Settings, Multiple Currency, Auction Group, and Terms and Conditions Settings.
Time Settings
This is the area where the start and end dates of the auction are determined.

Start Date:Indicates the starting date of the auction.
Time: The area where the time of the auction in minutes is entered.
End Date:Automatically updated in the system based on the start date and auction time.
Automatic Extension: When this area is enable, if suppliers submit bids when the remaining time for the auction is less than the automatic extension time, the auction is extended by the automatic extension time.
Automatic Extension Time: During the specified time period in this area, if bids are received in the last minutes of the auction, the auction duration will automatically extend. If no bids are received, the automatic extension function will not be enabled.
You can click on the "i" icon to be view detailed information for the relevant areas.
Bidding Status Settings
The area where competition information is managed in the auction.

Leadership: When this button is enable, suppliers can see whether they have the best bid for each item.
Best Bid: When this button is enable, suppliers can display the best bid amount for each item.
Ranking: When this button is enable, suppliers can display their rankings for each item.
Distance to Next Competitor Ahead: When this button is enable, suppliers can display the difference in their bid compared to the ahead supplier for each item.
You can click on the "i" icon to be view detailed information for the relevant areas.
Bidding Settings
The area where suppliers can manage the bids they can bid in the auction.

Min/Max Change Type: This is the area where the minimum and maximum bid change that auction suppliers can make in their bids at once is determined. There are 2 types of selection available. Percentage and Quantitative change amounts can be processed.
Minimum Bid Change: This is the area where the minimum bid change that auction suppliers can make in their bids at once is determined. When Percentage is selected in the Min/Max Change Type, the minimum bid change value must be entered as a percentage. When Quantitative is selected in the Min/Max Change Type, the amount of minimum bid change should be entered in the currency specified for the auction in the General Information step.
Maximum Bid Change: This is the area where the maximum bid change that auction suppliers can make in their bids at once is determined. When Percentage is selected in the Min/Max Change Type, the maximum bid change value must be entered as a percentage. When Quantitative is selected in the Min/Max Change Type, the amount of maximum bid change should be entered in the currency specified for the auction in the General Information step.
Equal Bid: When this button is enable, suppliers can submit equal bids. When it is disable, suppliers cannot submit equal bids.
You can click on the "i" icon to be view detailed information for the relevant areas.
Passing Best Bid Condition: When this button is enable, suppliers must exceed the best bid. For the obligation to exceed the best bid to be enable, the Best Bid button must first be enable in the Bidding Status Settings.
You can click on the "i" icon to be view detailed information for the relevant areas.
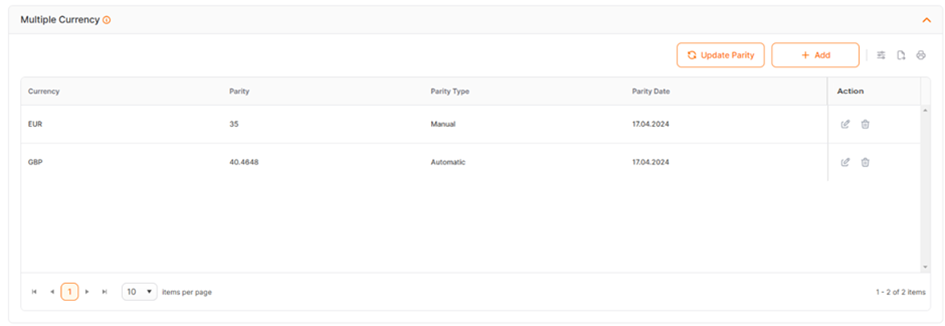
Multiple Currency
This is the area where additional currencies are selected so that suppliers can bid outside the currency of the auction. When the Add button is clicked, a currency selection is made in the window that opens, and additional currencies can be added to the auction with a check mark in the action column below. The parity of the added currencies automatically come with the current Central Bank selling effective rate according to the event currency. You can update the parity with the Update Parity button. The parity can be calculated and entered not only with the Central Bank effective but also with a manual value.
You can click on the "i" icon to be view detailed information for the relevant areas.
Auction Group
This is the area where internal users who will be able to track the created auction and make changes can be added as auction authorized.
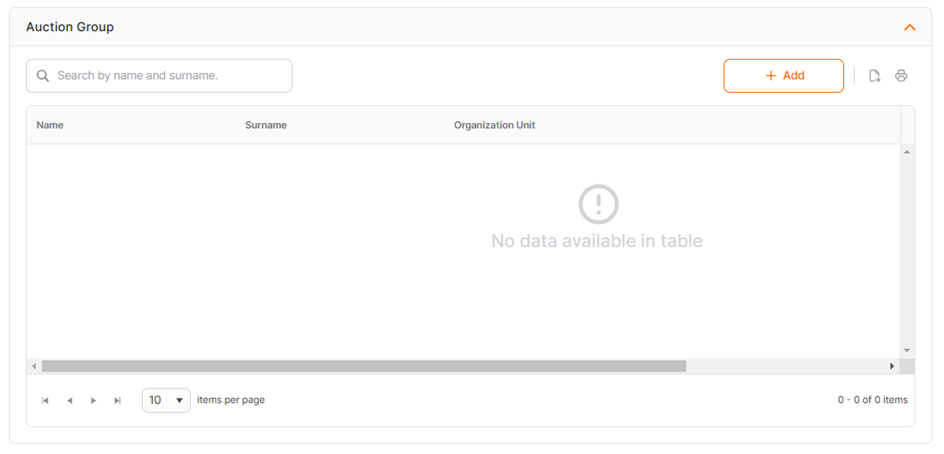
To add a new authorized person, the Addbutton must be clicked.
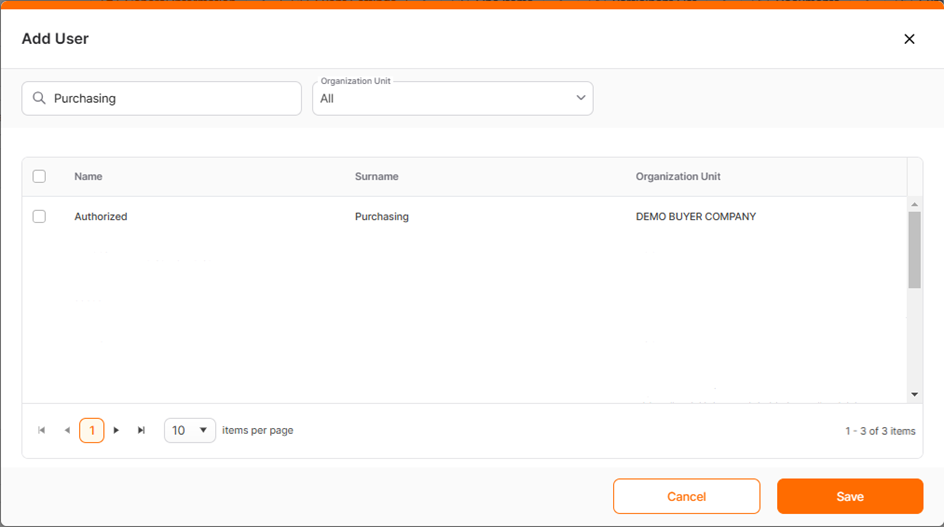
In the window that opens, the users who are intended to be added as auction authorized should be selected, and then the Savebutton must be clicked.
Added users can display or edit auction details. If the “Management Authorization” button is enable, they are granted the authority to manage and edit the auction. If the button is disable, they only have viewing authority.

Terms and Conditions Settings
This is the area where the terms and conditions of the auction are specified in written and document form.
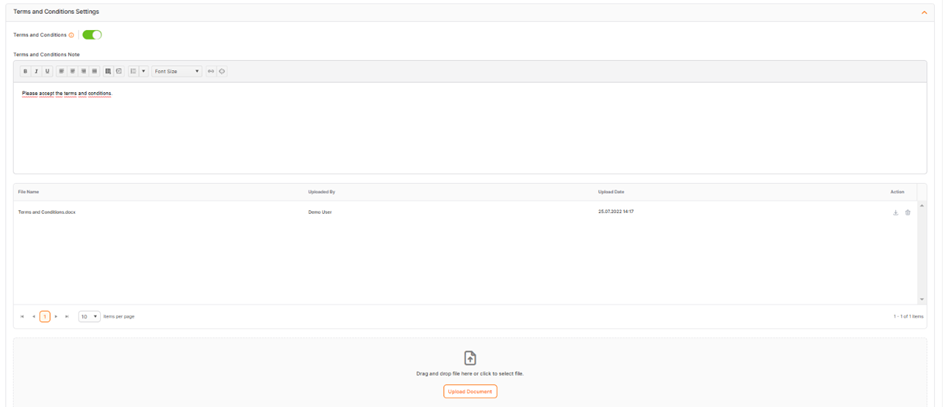
Terms and Conditions: When this area is enable, suppliers cannot bid on the auction without accepting the requested Terms and Conditions text and documents.
You can click on the "i" icon to be view detailed information for the relevant areas.
Terms and Conditions Note: In this area, Terms and Conditions Notes are displayed by all suppliers added to the auction.
The first method to add documents to the event is the drag-and-drop method. You can add the relevant document to the event by dragging it to the upload area.
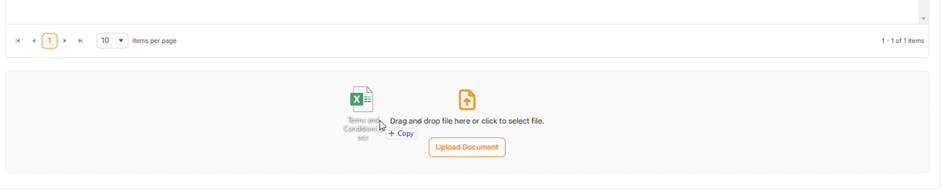
The second method is the select-from-computer method. By clicking on the upload area, you can drag and drop the relevant document from your computer to upload it.
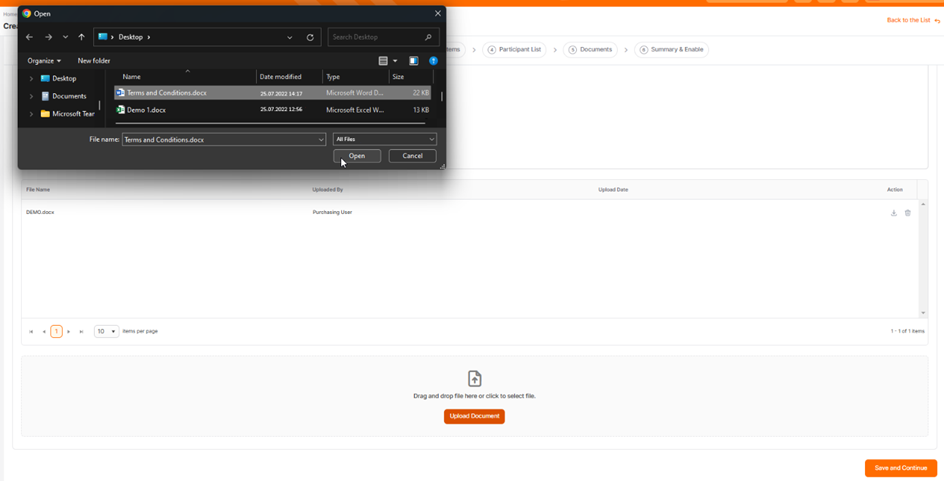
The document to be uploaded must be a maximum of 100 MB and in supported formats. If you attempt to upload a file in an unsupported size or format, an error message will be displayed in the top right corner of the screen.
Please refer the link below for further information on adding a Starting .
 Promena
Please refer the link below for further information on General Information page.
PromenaPlease refer the link below for further information on Event Settings page.
PromenaPlease refer the link below for further information on Participant List
PromenaPlease refer the link below for further information on Documents
Promena